

If you are like me, you are just learning about this wonderful and fascinating world of candle-making. I’ve been learning for over a year now and believe I have learned the basics of this hobby. So, I decided to put together an introductory article about how to make candles.
How do you make a candle? Measure and melt the wax in a pouring pitcher using a double-boiler method. Adding dye and fragrance are optional. Prep your container or mold by adding the wick or wick pin, respectively. Pour the wax into the container or mold and allow to cure.
Of course, these are very basic steps and require a little more explanation. There are different types of candles you can make. Please read on to find a step-by-step guide of how to make either a container candle or a pillar candle for yourself.
How to Make a Container Candle
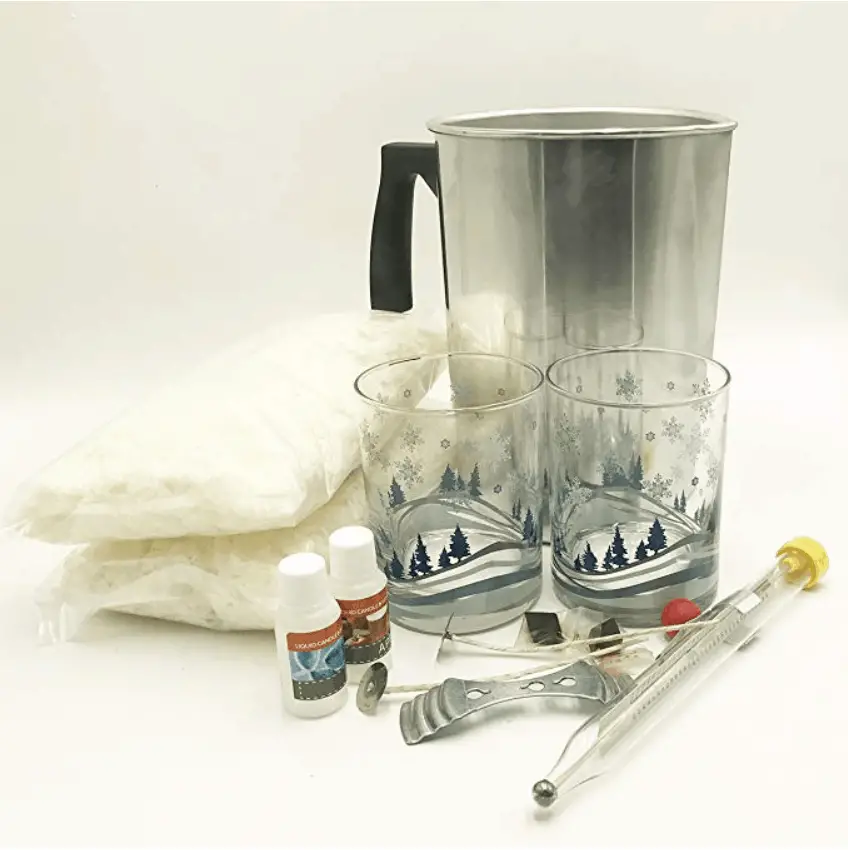
First, let’s talk about the supplies and equipment you will need for this. Buying a candle-making kit would be a great option, because they come with all the supplies you would need. You just need to get a pot for boiling water and use your kitchen stove or hot plate.
Here is a link to a great beginner’s kit I found on Amazon.
You can also check out my Recommended Products page for other essential supplies.
We will be using a double-boiler method to make our candles. A double-boiler uses a pot of boiling water on the bottom with another container inside the water bath.
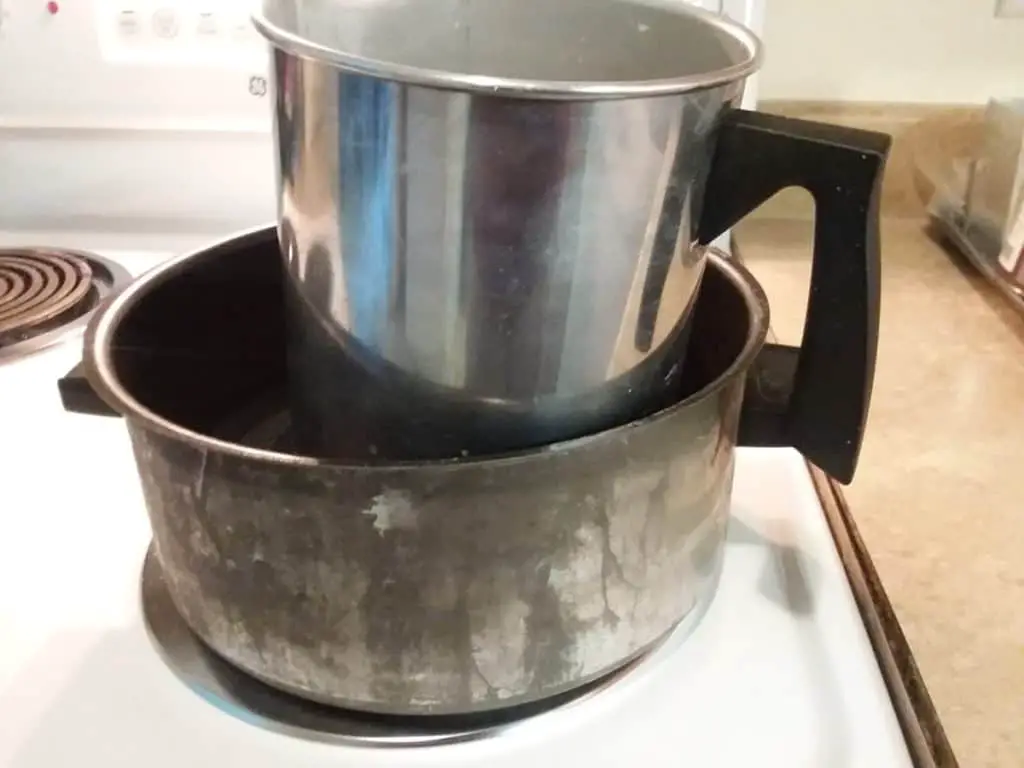
Wax can ignite if it is heated directly on the stove, so we will melt the wax using a hot bath, or double-boiler. For this, you can use either your kitchen stove or a hot plate.
Generally, 1 pound of wax makes approx. three (3) 8-oz. candles.
I wrote an article about the best type of wax to start making candles with that you may find helpful here.
I also wrote an article about the best types of containers for candles. You want to make sure you are picking an appropriate glass jar or tin container for making your candle.
EQUIPMENT:
- Stove or hot plate
- Pot of water
- Pouring pitcher
- 1 lb. wax (soy is a good place to start when making a container candle)
- 1 diamond dye block or liquid dye
- 1 oz. of fragrance oil
- Optional: glass jar to weigh out the fragrance
- Scale
- Thermometer
- Stirring stick, preferably glass or metal, such as a skewer stick (not wood or plastic)
- 3 (three) 8-oz. containers (such as Mason jars or tin containers)
- Wicks and glue dots or hot glue
- Wick holder or wick stick
- Newspaper, wax paper, or other material to protect your work surface
DIRECTIONS:
1 – Prepare double boiler
Start by putting just a couple inches of water in the pot and put it on your stove or hot plate.
You will heat it up so it is steaming or boiling to melt the wax, which will be in the pouring pitcher.
2 – Weigh out wax
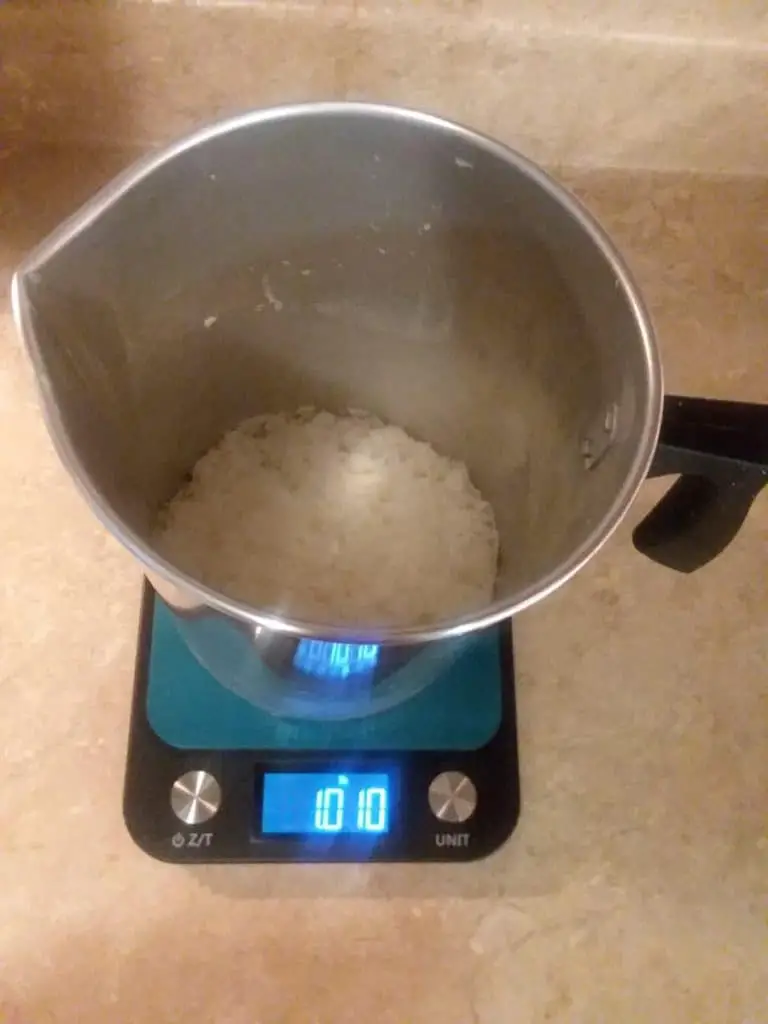
Next, weight out your wax in either a separate container or directly in the pouring pitcher.
I would recommend using one pound for 3 (three) 8-oz. containers. If you are using a pint (16-oz.) Mason jar, use approx. ½ pound of wax if you are going to add fragrance and dye.
When weighting out your wax, what you can do is subtract the weight of your container by putting it on the scale first to “zero it out” by hitting the “tero” button. Then, you add the wax to get the appropriate weight.
3 – Pouring pitcher with wax goes in the bath

Once you have your correct measurement/weight of wax in the pouring pitcher, put the pouring pitcher in the water bath to allow the wax to melt.
Put a thermometer in the wax to keep track of the temperature, because we will be adding dye, fragrance, and pouring at certain temperatures.
You can stir the wax to help it melt down.
4 – Prepare your work surface and containers
While the wax is melting, you can protect your work surface and prepare your containers.
Don’t forget to cover your work area with either newspaper, wax paper, or some other material to protect it.
Then, set your containers down on the paper.
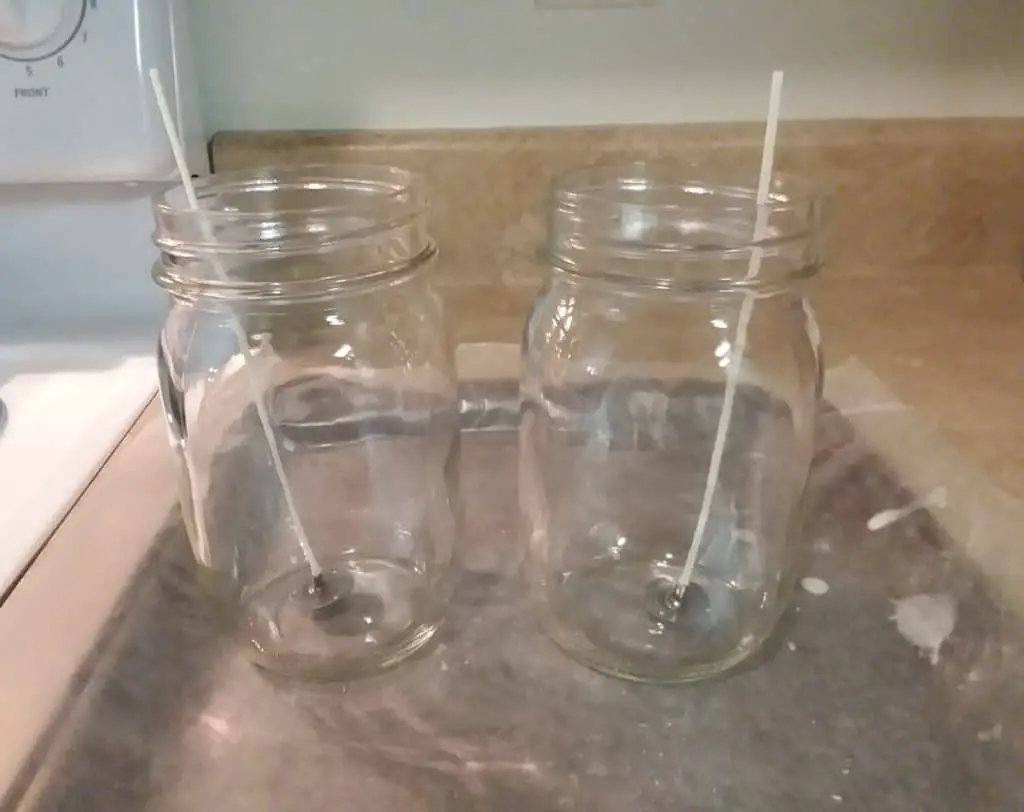
You will add the wicks to the jars with either a glue dot (or wick sticker) or you can use hot glue instead.
If you have a tall glass jar, you may need to use a stirring stick or some other long utensil to press the wick to the bottom of the jar, unless your container mouth is wide enough and/or you have really long fingers.
Make sure your wick is centered on the bottom of the jar. Then, pull the wick taut, but not too tight, and clip it with a wick bar or wick holder, which will hold the wick centered. The wick holder just sits on the rim/top of the jar.
One trick I have learned along the way is to heat the containers, which helps with glass adhesion. But for your first time making candles, I would say not to worry about this, because it is important to learn as you progress along the way in your journey of candle-making.
So, you will learn what I mean when I say that heating your jars before-hand prevents frosting. But I think it’s important that you see what your candle look like and how they would turn out if you did not heat the jars. Then, with your next batch, once you feel you have the basics down, you can try heating the jars and adding other techniques or tricks into your candle-making routine.
5 – Add dye and fragrance
Once the wax has all melted down or reaches approximately 185 °F, turn off the heat. Continue stirring. Allow the wax to cool.
You will add dye and fragrance at different temperatures, which will vary depending on the type of dye/fragrance and the brand.
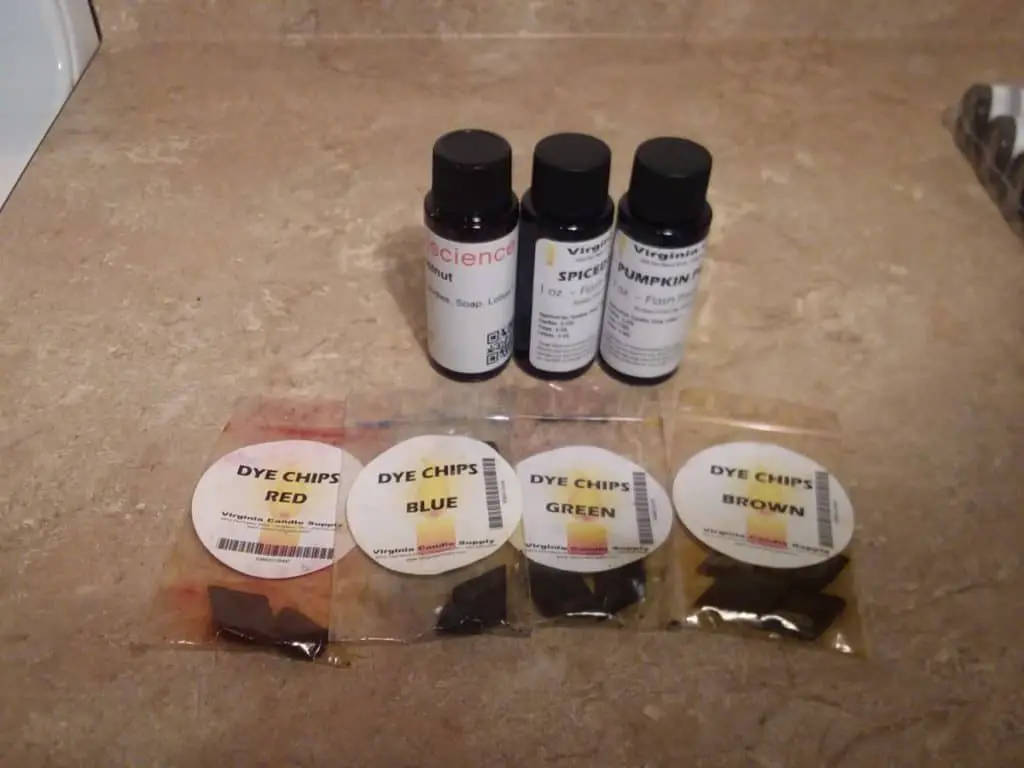
Read the label, which should tell you at what temperatures to add, but generally you add the dye at about 175 °F and fragrance at 140 °F or less, but it depends on the flash point of the fragrance.
You can get a small diamond dye block as a sampler, which makes it easy to measure, because you just add the one diamond to one pound of wax. It eliminates the measuring process.
However, the dye color chip does not need to be measured so precisely as the wax and fragrance dye. If you want a lighter color you add less dye. If you want a darker color, you add more dye. Simple as that!
So, like I said, check the label and follow the manufacturer’s recommendations. You add the fragrance at a lower temperature, so that it does not burn off from the heat.
The general rule of thumb is one oz. of fragrance for one pound of wax.
If you are just making one 16 oz. (1 pint) Mason jar candle, I would use just ½ pound of wax and ½ oz. of fragrance.
You can get small 1 oz. sample containers of fragrances, which makes it easy to use, because you just pour the whole bottle in and you don’t have to weigh it out.
However, if you have a larger container of fragrance, you will want to weigh out your fragrance. Take a glass jar and set it on the scale. Hit the tero button to “zero” it out. Then, slowly add the fragrance until you have approx. 1 ounce of fragrance. Then, add it to your wax at the appropriate temperature.
Make sure you stir after you add the dye and fragrance to make sure it is fully incorporated into the wax. You want to make sure the dye chip is completely dissolved before pouring your candle.
So, the key tip here is stir, stir, stir.
However, be cautious of creating too many air bubbles, which when pouring into your container, will affect the final state of the candle.
So, gentle, not aggressive, stirring is helpful.
6 – Pour at 120 °F or less
Keep checking your temperature and once you get to the pouring temperature, approx. 120 °F or less, pour the wax into the container(s).
When I was first learning, the candle kits seemed to suggest pouring between 120-130 °F, but as I’ve learned more about the candle-making process, I’ve learned pouring at a cooler temperature is actually better.
So, I would recommend pouring between 110-120 °F. Or if you can even wait until 100 °F, the wax would start getting solidified and would have a “skin” on top, or even start looking “slushy.”
7 – Center the wick and allow to cool
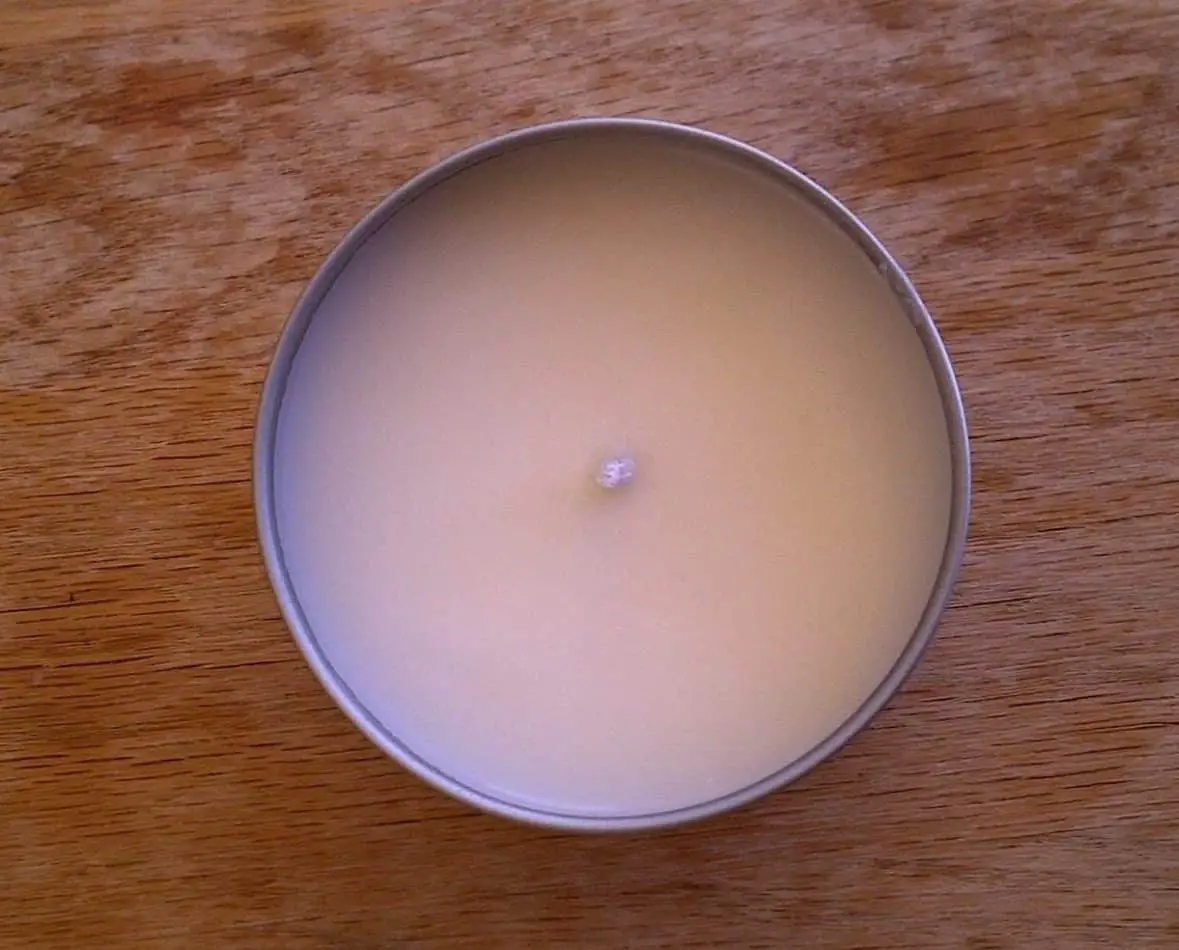
Once you fill the wax to the top of the container, make sure the wick is centered.
Allow your candle to set.
For soy wax candles, wait at least 2 days to light it, but the best results would come by letting your candle cure for at least 7 days.
CLEAN UP:
- Take a paper towel and wipe out any wax left behind in the pouring pitcher. You may need to heat up the pitcher again to get any solidified residue left behind. Melting the wax remnants will make them easier to get out. Throw away the paper towel.
- Dump out your water and wash the pot.
- Wipe off your equipment (thermometer, stirring stick, glass jar, etc.) with a paper towel.
- Unplug and put away hot glue dispenser, if you used it.
- Once the candles have solidified (several hours), you can take them off the paper or protective surface you had laid down. Throw away the newspaper or wax paper you had used.
- Take off the wick holders and wipe them down with a paper towel or wet wipe.
- Wipe down your surface with a wet disinfecting cloth.
I hope you found this tutorial guide helpful to starting your candle-making hobby. It is really a great and fun craft to get into.
Most people start/learn candle-making with container candles. Once you feel you have mastered that or want to try something different, you can try making a pillar candle.
How to Make a Pillar Candle
Pillar candles are great. I enjoy decorating pillar candles. They can be as simple or as elegant as you want them to be.
Since pillar candles are free-standing, they require a harder wax. Soy wax is not recommended for pillar candles. Paraffin, palm, beeswax, or a paraffin-soy blend are the best options for making a pillar candle.
I wrote an article about how to choose the best wax for the candle you are making, so if you’re not sure which wax to use for the type of candle you are making, that would be a good resource for you.
Here is my recipe for making pillar candles.
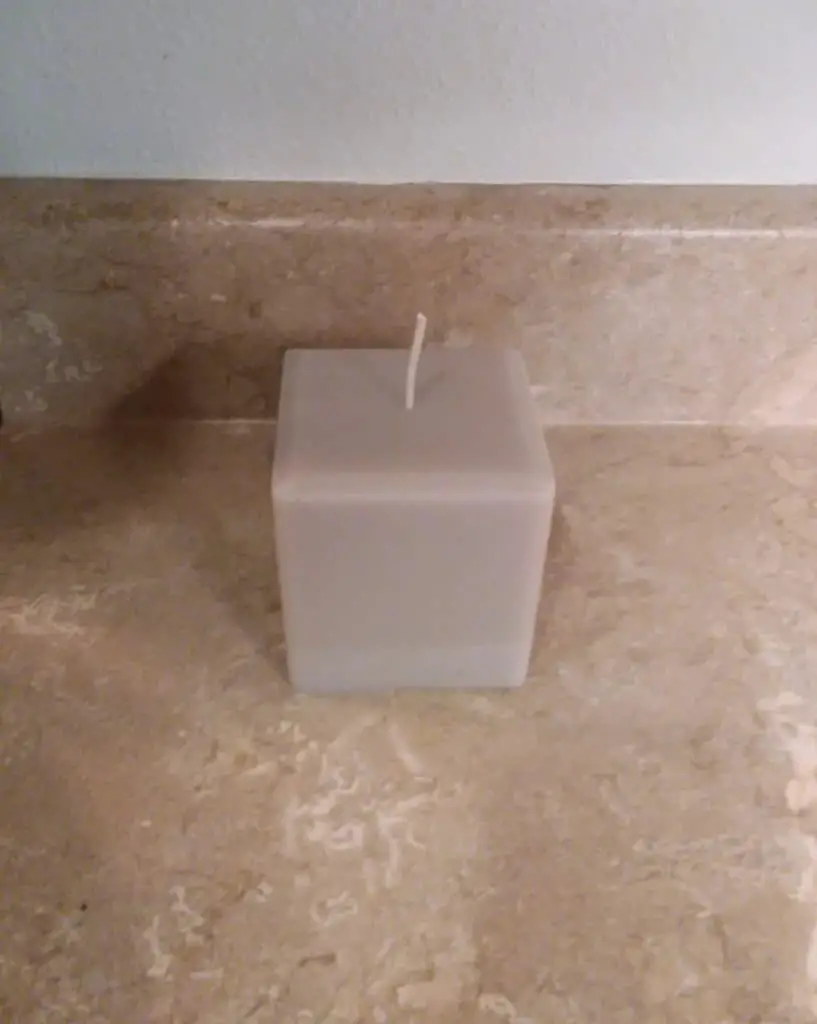
You need approx. 22 oz. of wax for a 3 x 6 inch pillar candle, that is a little over 1 1/3 pounds. I would measure out 24 oz. or about 1 ½ pounds just to be on the safe side. It’s better to have too much than not enough.
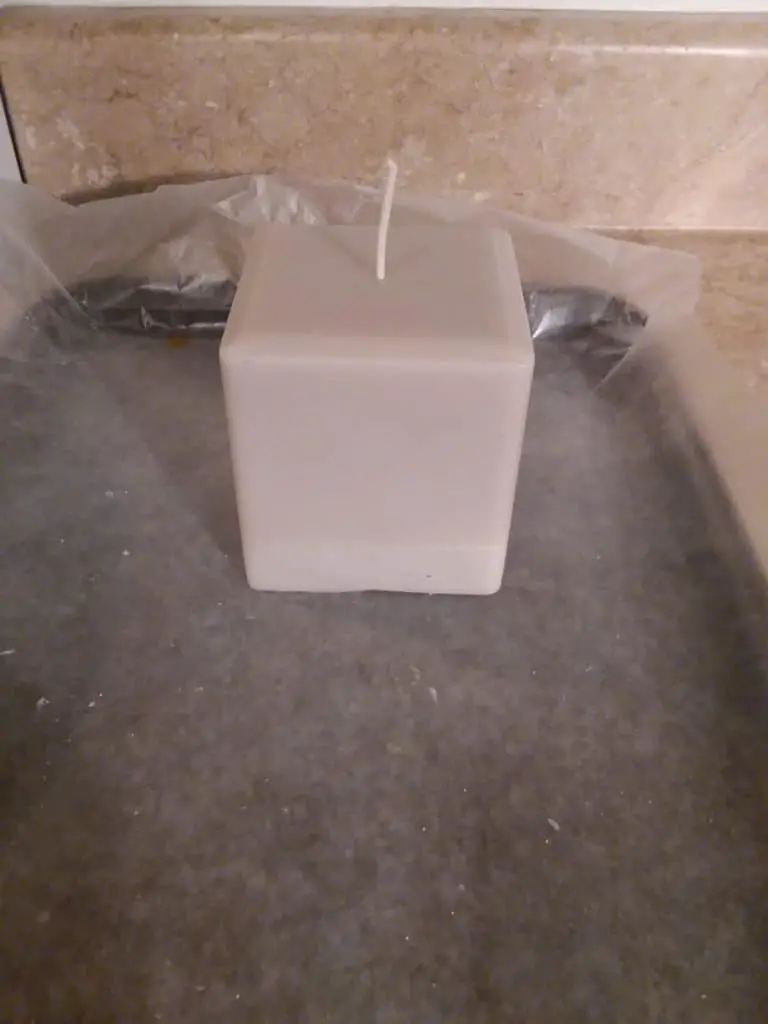
For the pictures, I created a 3 x 4 inch pillar candle and used approx. 1 pound of wax.
For fragrance, the ratio is usually 1 oz. of fragrance for 1 pound of wax. So, for approx. 1 ½ pounds of wax, we can use 1 ½ oz. of fragrance.
There are actually a couple different methods of making pillar candles, depending on the type of wick you are using.
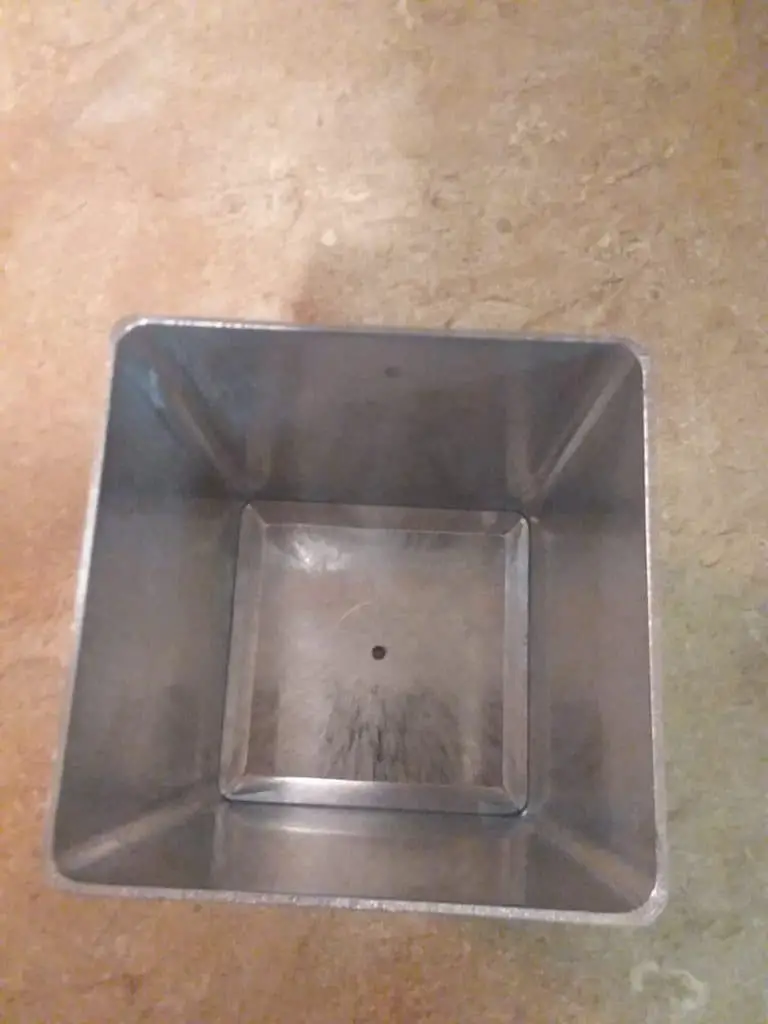
You will notice the mold has a hole for the wick. We will be using putty to help hold the wick or wick pin in place and to plug the hole, so we don’t get any wax leaking out.
If using loose (or spooled wick), you don’t need the wick pin. We will be using putty and tying off the wick ends to keep them in place.
However, if you want to use the pre-tabbed wicks, you will need a wick pin. This creates a hole/tunnel through the center of the candle and you can just slip the wick through at the end when the candle is solidified.
The weird thing about making pillar candles is that the bottom of the mold will actually be the top of your candle when finished. Some candle molds are simply flat and frankly it won’t make much of a difference which end is the bottom or top.
However, there are some candle molds that have a distinctive shape to them, such as a concave surface or rise to a tip. So, be aware if your pillar candle mold has one of these unique features.
The other unique thing about making pillar candles, is that we are actually going to pour the wax twice.
Paraffin wax shrinks (or condenses) as it cools, which is going to cause the wax to pull away from the sides of the mold and the wick (pin) in the center, resulting in sinking of the wax as it solidifies.
The first pour will create a dip in the wax as it cools. So, we will open up any air pockets and pour again to fill in any holes to create a final flat surface.
INGREDIENTS:
- Stove or hot plate
- Pot of water
- Pouring pitcher
- 22 oz. (or 1 ½ pounds) wax (paraffin is a good wax to start with when making pillar candles)
- 1 diamond dye block or liquid dye
- 1 ½ oz. of fragrance oil
- Optional: glass jar to weigh out the fragrance oil
- Scale
- Thermometer
- Stirring stick, preferably glass or metal, such as a skewer stick (not wood or plastic)
- 3 x 6.5 candle mold
- Optional: candle pin
- Putty (or could use duct tape)
- Wick, can be either loose (spooled) or pre-tabbed (attached with a metal bottom)
- Wick holder or wick stick, could also use a pencil, popsicle stick, etc.
- Newspaper, wax paper, or other material to protect your work surface
- Small tray, such as a cookie sheet, might be beneficial, just in case your putty or tape doesn’t hold up and your candle spills out the bottom.
- Optional: Mold release spray
DIRECTIONS:
The first 5-6 steps are essentially the same as making a container candle: melting your wax and adding the dye/fragrance.
1 – Prepare double boiler
Start by getting your double-boiler set up, putting just a couple inches of water in a cooking pot and putting it on your stove or hot plate.
You will heat it up so it is steaming or boiling to melt the wax, which will be in the pouring pitcher.
2 – Weigh out wax
Next, weigh out your wax in either a separate container or directly in the pouring pitcher.
I would recommend using 1 ½ pounds to make a 3 x 6 inch pillar.
When weighting out your wax, what you can do is subtract the weight of your container by putting it on the scale first to “zero it out” by hitting the “tero” button. Then, you add the wax to get the appropriate weight.
3 – Pouring pitcher with wax goes in the bath
Once you have your correct measurement/weight of wax in the pouring pitcher, put the pouring pitcher in the water bath to allow the wax to melt.
Put a thermometer in the wax to keep track of the temperature, because we will be adding dye, fragrance, and pouring at certain temperatures.
You can stir the wax to help it melt down.
4 – Prepare your work surface and mold
While the wax is melting, protect your work surface by laying down newspaper or wax paper.
Next, we will get the candle mold ready.
Optional: You can spray the inside of the candle mold with a mold release spray, which is supposed to make it easier to get the candle out when done.
Then, take your candle mold and either thread the wick through or put your wick pin in. I will discuss both methods.
Spooled Wick
If you are using the spooled wick, you will thread it through the hole on the bottom of the mold.
Pull enough wick through so that you can tie some extra on the other end around a pencil or other wick holder.
On the bottom, you will keep a couple inches of the wick out and place putty (or duct tape) over the hole, so that candle wax does not leak out.
Set the candle mold down, so the putty side is on the bottom and the opening for pouring the wax in is on the top. Then, on the top side, wrap the excess wick (3-4 inches) around a pencil, popsicle stick, or other type of wick holder. Then, pull the wick taut and make sure it is centered. The wick holder just sits on the rim/top of the candle mold.
Pre-tabbed Wicks
If you are using the pre-tabbed wicks, you will use a wick pin. You simply put the wick pin into the candle mold.
The wick pin creates a hole/channel through the center of the candle, so when we are done and the candle has solidified, you just slip the wick through the center of the candle.
5 – Add dye and fragrance
Once the wax has all melted down or reaches approximately 185 °F, turn off the heat. Continue stirring. Allow the wax to cool.
You will add dye and fragrance at different temperatures, which will vary depending on the type of dye/fragrance and the brand. Read the label, which should tell you at what temperatures to add, but generally you add the dye at about 175 °F and fragrance at 140 °F or less, but it depends on the flash point of the fragrance.
You can get a small diamond dye block as a sampler, which makes it easy to measure, because you just add the one diamond to one pound of wax. It eliminates the measuring process.
However, the dye color chip does not need to be measured so precisely as the wax and fragrance dye. If you want a lighter color you add less dye. If you want a darker color, you add more dye. Simple as that!
So, like I said, check the label and follow the manufacturer’s recommendations.
You add the fragrance at a lower temperature, so that it does not burn off from the heat. The general rule of thumb is one oz. of fragrance for one pound of wax. Since we are using 1 ½ pounds of wax, I would recommend you use 1 ½ oz. of fragrance.
Take a glass jar and set it on the scale. Hit the tero button to “zero” it out. Then, slowly add the fragrance until you have approx. 1 ½ ounces of fragrance. Then, add it to your wax at the appropriate temperature.
Make sure you stir after you add the dye and fragrance to make sure it is fully incorporated into the wax.
You want to make sure the dye chip is completely dissolved before pouring your candle.
So, the key tip here is stir, stir, stir.
However, be cautious of creating too many air bubbles, which when pouring into your container, will affect the final state of the candle.
So, gentle, not aggressive, stirring is helpful.
And don’t let the candle cool to much. With pillar candles, we want to pour at a higher temperature, approx. 140-180 °F.
6 – Pour wax into candle mold
Pour the wax into the candle mold as soon as the dye and fragrance are thoroughly dissolved and mixed. Leave a couple inches to spare from the top of the candle mold. Remember we are going to be doing a second pour.
Allow your candle to start cooling.
7 – Poke holes in wax
You will notice the wax starting to sink.
After the wax has cooled for a while, maybe an hour or so, take a skewer stick and poke holes to open up any air pockets trapped underneath.
We will be doing a second pour to fill those air pockets and create a final, flat surface to our candle.
Remember the TOP of the candle mold is going to be the BOTTOM of our candle, so we need to make sure it is flat and even, so the pillar candle will sit correctly and not lop-sided when set down on a flat surface.
8 – Re-melt remaining wax and re-pour
Heat up your wax again, just enough to melt it. You don’t want to heat it up too high, because remember too high of a temperature will burn off your fragrance.
You can stir the wax gently to help it melt quicker.
Once the remaining wax has melted again, pour it into your candle mold, filling it almost to the top, but leave about ½ inch from the rim.
Spooled wick
If you are using the spooled wick, make sure your wick is centered and the wax is not so high that it is touching your wick holder. Otherwise, there will be an imprint of your wick holder into the wax when it is set.
Remember, we want a flat surface here, because this will be the bottom of our candle.
9 – Allow candle to cool and set
Leave for several hours, or even overnight, to solidify.
10 – Remove wick holder/putty or wick pin
Then, you can unwind the spooled wick from the pencil or wick holder you had on top. Take the putty off the bottom of the mold.
Or take out the wick pin if using the pre-tabbed wicks.
Release your candle from the mold by gently tugging on the wick, if you used the spooled wick.
Hopefully, the candle should just gently slide/glide out. If you used a mold release spray, your candle should come out easily.
If you are having trouble getting the candle out of the mold, you could put it in the fridge or freezer for just a few minutes. Cooling the candle in this way will cause it to contract, which will make it easier to get it out of the mold.
CAUTION: However, you don’t want to freeze the candle, because it could crack. So, if you are going to try this method, only leave the candle in for a few minutes. Just long enough to get the wax to release from the sides of the mold. Typically between 5-10 minutes at a time.
11 – Trim the spooled wick or add the pre-tabbed wick through the hole
Once you get your candle out of the mold, you can trim the wick(s).
If you used the wick pin, you should see the hole/channel created and you can just slip your wick through.
Remember the BOTTOM of the mold, where the small hole for the wick (pin) was, is the TOP of your candle.
The TOP of the candle mold (open end where you tied the pencil or wick holder) is the BOTTOM of your candle.
So, you are going to completely trim that wick off, so it is even with the surface of your candle.
12 – Clean/remove any imperfections
If there are any imperfections with the candle, you can trim off any rough edges with a knife or other sharp object. Or take a heating tool to smooth out any uneven areas/surfaces.
Trim the wick to ¼ inch and enjoy!
CLEAN UP:
- Take a paper towel and wipe out any wax left behind in the pouring pitcher. You may need to heat up the pitcher again to melt any solidified residue left behind. Melting the wax remnants will make them easier to get out. Throw away the paper towel.
- Dump out your water and wash the pot.
- Wipe off your equipment (thermometer, stirring stick, wick holders, glass jar, etc.) with a paper towel and/or wet wipe.
- Wipe down your work surface with a wet disinfecting cloth.
I hope you found this tutorial helpful to try making your own container and pillar candles. I plan to also create a beginner’s guide to making other types of candles, such as tealights, votives, and tapers.
Recent Posts
An In-Depth Beginner Basics Manual on Candle Wicks: Wick Names and Numbers
Wick testing has to be the most frustrating part of candle-making for me. While I’ve been learning about the different types of wicks and which wick goes best with which wax, I noticed that...
A Complete Intro Lesson to Candle Wax Basics: How to Decipher the Code
After finishing my first candle-making kit and watching YouTube videos, I decided I wanted to try making more candles. I needed to order more wax, but quickly realized the options were...
