

2-Part Wick Series: Introduction to Wicks and How to Make Your Own DIY Wicks
Part 2: How To Choose a Wick and DIY Project
While trimming the wicks off of a few new candles I made the other day, I was thinking, “I wish there was a way to re-use or recycle these wick trimmings. It’s a shame to have to throw them away.” So, I kept them.
Then, when I had gotten to the bottom of a small, used, burned-up glass-jar container candle and saw the metal-bottom, I decided to pull it out to reuse it.
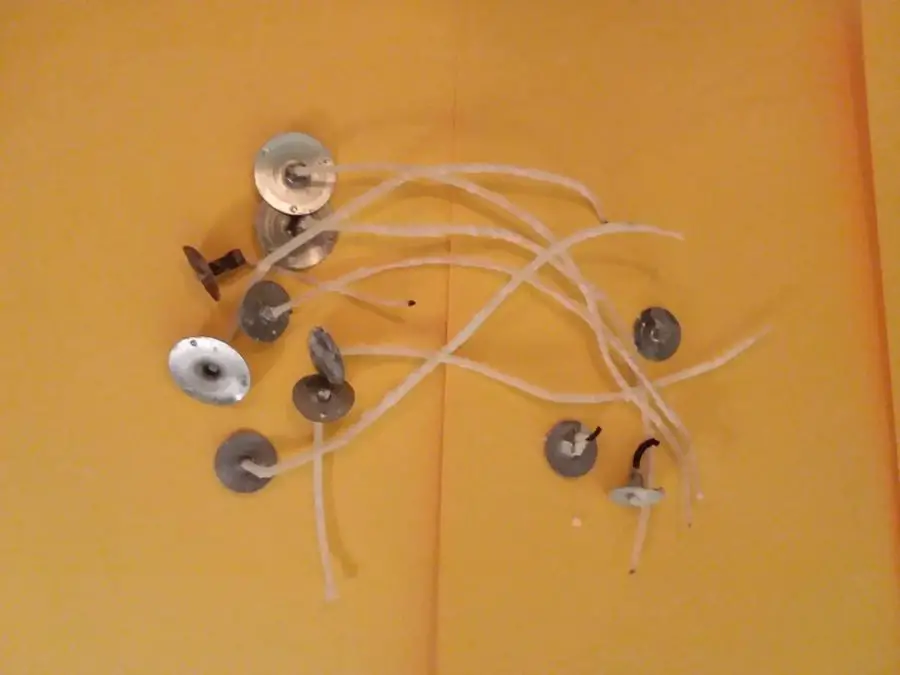
I had figured out a way that I could thread the wick trimmings I had saved through the metal-bottom that I had just plucked out of the candle. So, how does this work?
How do you make your own wicks? Wipe off all the wax from the metal-bottom. Take a needle-nose pliers and/or a needle/pin/tack to open up the hole of the wick bottom. Thread/push the wick through the hole. Once the wick is positioned correctly, take the pliers and squeeze the neck closed.
I have done this many times to save wick trimmings and re-make small candles by recycling old, used containers. If you would like more DIY ideas about what to do with your old wick trimmings and how to make your own wicks, please read on!
I have done some research and learned some things about wicks. This is Part 2 of a 2-Part Wick Series.
What Can Be Used as a Candle Wick?
If you don’t have any old wick trimmings to save, it is possible to make your own wicks out of basic, household materials.
Here are some common wick substitutes you could use, if needed. However, be cautious with these, because these may not create a clean-burning candle and it is generally recommended you only use these in emergency-type situations, such as a power outage.
Toothpicks
- Toothpicks, skewers, chopsticks, and popsicle sticks are all made of wood and would work as wicks when lit.
- However, toothpicks are usually much too short if you are making a tall candle, such as a pillar or container. These work better as more of a substitute for a wick, such as if your wick is buried in wax.
- Therefore, you would need something longer such as a BBQ skewer, chopsticks, or popsicle sticks if you are making a pillar or container candle.
- You will need a metal bottom to hold your make-shift wooden wick.
- Keep in mind your container or mold for the candle you are making cannot be taller than the wooden wick you are using. You don’t want the wooden wick to become buried, because then you have just created a new problem for yourself.
Yarn, Cotton String, or Twine
- Yarn could work as a wick, but it would need a stiffener, such as borax.
- Also, it would be best if the yarn did not contain any dye or bleach. So, I’m guessing any type of colored yarn would not work, but you will want to check the packaging of your yarn to see if it contains any dyes or bleach.
- A cotton string would work better than yarn.
- Butcher’s twine is another good substitute for a wick. It will need a stiffener, such as borax, and should be coated in wax prior to use.
Paper
- Any type of paper, such as regular copy paper, notebook paper, construction paper, cardstock, a paper towel, or toilet paper could be used as a wick.
- You will want to dip the paper into borax and melted wax to stiffen it and allow it to dry before you light it.
Cotton Strips
- Could cotton strips from an old shirt or socks work as a candle wick? I saw a blog post that suggested you could use cotton strips from an old shirt as an “emergency” wick to make your own candle.
- Although it seems plausible that it would work, because you are essentially using cotton, I’m not sure how effective it would actually be, since cotton shirts are made differently than cotton wicks.
- I would think a string from a sock might be a little more effective than a strip from a cotton shirt.
- Good cotton wicks are braided, plaited, or knitted.
Old Mop Strand
- I was surprised to discover that you could use an old cotton strand from a mop, but it makes sense; it is essentially braided cotton.
- Basically, any type of cotton string, cord, or material that could be fashioned into wick-form would work. It just needs to be cotton, not polyester.
Priming the Wick
Once you have chosen the material for your wick, the next step is to prime your wick.
Priming simply means we are preparing the wick, so it burns more efficiently.
If you are making your own wicks, priming is very important. One of the benefits of making your own wicks is that you can make batches of wicks, so they are ready for use when you are making candles.
It is also cheaper than buying wicks.
There are a couple of steps/methods of priming I will discuss here.
Besides improving the burning quality of the wick, another reason for priming wicks is to prevent water or moisture from being absorbed by the wick, especially cotton wicks. Cotton absorbs moisture and you don’t want your wick retaining water!
Priming wicks also helps to harden the wicks and make them stiff for use.
If you are using simple strings or strands of cotton for your wick, I would suggest strengthening the wick by braiding strands together.
The first step to priming your wicks is to braid the strings tightly together. The more tightly you braid the strands together, the less space there is for air bubbles to be trapped and the better it absorbs the wax.
As I discussed in my previous post about wicks, there are different types of ways to bind the threads together, such as square-braiding, flat-braiding, etc. I’m not going to go into those specifics in this post, since I already discussed them in my previous post.
If you would like to read my “Introduction to Wicks” post (Part 1 of this 2-Part Wick Series), you can read it here.
After you have tightly braided the stands together, you will dip them in melted wax.
As you are dipping the wick in the melted wax, hold it under for a few moments.
You want to watch for any air bubbles that may surface, which may take about 30 seconds.
When there are air bubbles being released, the wick is fully absorbing as much wax as possible, which is a good thing. This is what we want.
Once that happens you can take the wick out of the wax to let it dry.
How to Make Your Own Wicks!
There are actually two different methods I’m going to talk about, which you can use to make your own wicks.
The first method I’m going to discuss is using a borax solution. The second method is to use wick trimmings from an old candle you made.
I will start by discussing the borax method first and talk about using your old wick trimmings later.
The most common DIY tutorial for making your own wicks at home is to use a borax solution. This is not the quickest method, because it actually takes a few days to do.
If you are looking to make a candle in a hurry and you don’t have a wick, don’t expect to be able to make your own wick for your candle project to get it done right away.
The best material for your wick would be 100% cotton twine, but any type of braided string should work, too.
We will be coating the string or twine in wax. The goal is to have the wick burn steady, but not too quickly.
Therefore, it’s important to start with the right wick material. In addition, the borax solution helps with this process of slowing down the burn rate.
Then, you will use melted wax to coat the string to help it burn.
We will be creating our own wick solution from water, salt, and boric acid (or borax).
Here is a recipe you can follow to make your own wicks with borax.
INGREDIENTS:
- 1 cup hot (not boiling) water
- 1 Tbsp. salt
- 1 Tbsp. Borax
- Butcher’s Twine, Cotton Twine, or any type of thick, braided string or cord
- Paper clips or clothespins
- Melted wax
- Old container or drop cloth to catch the dropping borax solution or wax
DIRECTIONS:
- Start by mixing together the water, salt, and borax.
- Next, soak the twine or string in the borax solution for about 24 hours.
- The next day, you will need some place to hang the string. You will probably want to hang it outside or in a mud room, garage, or other place/room in your home/house that is not heavily trafficked or will not be disturbed/disrupted with this project in the way. You will have to hang the string and allow it to dry for up to 48 hours. You will want to put something underneath the string to catch the droppings as the twine dries.
- After the string dries for 48 hours, the next step is to coat the string in melted wax and then let this dry for several minutes. You can repeat this step a couple times to build up a thick coating of wax, but one coat should be sufficient. However, the more coats of wax that are on the wick will help the wick to burn properly. This is the priming method discussed earlier.
How ever many times you chose to dip the string in wax, just make sure that the final wick is stiff and should stand up-right. This helps the wick to burn properly. A wick that burns too quickly will extinguish without a full wax pool and cause the candle to burn/melt unevenly. Then, you will be left with a candle without a wick.
The other purpose of coating the material is to make it stiff so it stands upright. You don’t want a wick that falls into the wax, because then it won’t stay lit to burn.
As you can see, this project of making your own wicks from string and a borax solution will take 3-4 days.
Once you got your wick made, coated, and ready for use, you can use it for your candle-making project!
What to Do with Your Old Wick Trimmings
Keep your wick trimmings and old metal bottoms!
The second method of how to make your own wicks that I’m going to discuss now involves using old wick trimmings and recycled metal bottoms from old, used container candles.
Make sure to remember (or take note) of the type of candle the wick came from. You are going to want to make the same type of candle the wick came from.
Because wick size is important, you don’t want to create a candle that is too big for the wick you are using, or vice versa.
Here is a recipe for how to recycle your old wick trimmings.
SUPPLIES:
- Old wick trimmings
- Metal bottom from a used container candle
- Needle-nose pliers
- An awl, needle, safety pin, or tack (something with a sharp, pointed tip)
- Tweezers
- Paper towels
DIRECTIONS:
- Take the metal-bottom of the old wick and wipe off all the wax from the metal-bottom.
- Take a needle-nose pliers and/or an awl to open up the hole/neck of the wick bottom.
- Take out the old, used wick with tweezers and throw it away.
- Thread/push the new wick through the hole.
- Once the wick is positioned correctly, take the pliers and squeeze the neck closed.
I would use this method more for when you are experimenting with dye colors, new fragrances, or testing jars for a new product.
DO NOT use this for something that you are giving as a gift (or selling) without knowing for sure that the wick is the appropriate one for the candle wax, size, type, fragrance, and dye!
Candle Tunneling or a Buried Wick
If you are having trouble with a candle that is tunneling or has a buried wick, I have already created a couple of posts that you may find helpful here.
However, I will summarize the methods discussed in those articles here:
1 – Substitute Your Wick
- The first method would be to substitute your wick.
- If your wick is buried in the wax and you can’t dig it out, just add a new wick to start a new flame.
- You can do this with a toothpick or other wick substitutes discussed earlier.
2 – Elongate Your Wick
- The other option would be to elongate your wick by adding material to whatever stub of a wick you may have sticking out.
- This method only works if you can dig out the wax around your wick to get to your wick.
- You can add paper to the wick, by wrapping it around the original wick, which will hopefully cause the real wick to start burning again.
- Be careful though, because once the wax starts to melt, it may become buried again. That is why you may have to dig out some of the excess wax around the wick.
3 – Aluminum Foil
- A third option would be to use the aluminum foil method.
- The aluminum foil method requires you to get rid of the wax around the wick.
- Once your wick is unburied and the wax is even again, light the candle.
- Place aluminum foil around the top half of the candle, leaving a hole for air and heat.
- This helps to heat up the top layer of wax, so it all melts evenly.
- Be cautious with this method, because if your wick is too short, it will become buried again when the entire top layer of wax melts.
- Therefore, you will want to dig out enough wax, so that it does not bury the wick. Or make sure the wick is long enough or extend the wick.
4 – Burn It Right the First Time
- Make sure you are burning the candle for at least 2-3 hours the first time you light it to prevent it from creating a tunnel.
- The general rule of thumb is to burn a candle 1 hour for each 1 inch in diameter.
- Therefore, for a 3-inch wide candle, you would burn it for 3 hours the first time you light it to prevent tunneling.
5 – Candle Warmer
- Another method to fix candle tunneling or a buried wick is to put the candle on a warmer.
- This melts the wax evenly, so you can still enjoy the fragrance of the candle.
- Then, once the wax is below the wick again, you can light it again.
I hope you enjoyed this DIY tutorial.
This was Part 2 of a 2-Part Wick Series. If you missed Part 1 on the introduction to wicks, you can check it out here.
Thanks for reading and I hope you enjoy making your own wicks!
Recent Posts
An In-Depth Beginner Basics Manual on Candle Wicks: Wick Names and Numbers
Wick testing has to be the most frustrating part of candle-making for me. While I’ve been learning about the different types of wicks and which wick goes best with which wax, I noticed that...
A Complete Intro Lesson to Candle Wax Basics: How to Decipher the Code
After finishing my first candle-making kit and watching YouTube videos, I decided I wanted to try making more candles. I needed to order more wax, but quickly realized the options were...
