

Don’t you hate it when a candle starts to burn straight down the middle because the edges never melt and you are left with a ring around the edge of the candle? I guess I just thought that was normal and was how candles burned. However, after further reflection, I thought there should be a fix for this and did some research. I found out this is not normal! Candles are supposed to burn evenly. This is what I learned about how to get a candle to burn evenly and prevent or fix candle tunneling.
So, how do you get a candle to burn evenly? The first time you burn a candle, it creates or sets a “memory” in the wax. This wax memory will be the foundation for how the rest of the candle will burn. If the candle is not burned properly the first time, it will start to “tunnel.” The candle needs to stay lit for approximately 2-3 hours the first time you burn it. However, burn time is dependent on the size/diameter of the candle. The general rule of thumb is: 1 hour for every 1 inch in width.
Who knew candle burning was so elaborate? But, it’s true! The first burn is critical, so it’s important you have the time to burn the candle for at least 2-3 hours the first time you light it. I’ve included some important tips to prevent and fix candle tunneling.
What is Candle Wax Memory?
Candle wax memory refers to how a candle burns and the wax melts after it is lit for the first time. The first burn creates a wax pattern or “memory” for each subsequent burn. The first burn will determine how your candle will melt for the rest of its life. The pattern is set from the initiation to the termination of the first flame (that sounds so enchanting!).
Candle wax memory is affected by the following criteria:
• Type of candle. Whether it is a free-standing candle (such as a pillar) or within a container (such as a jar candle or votive candle) affects how the candle burns and will determine whether a candle is more likely to “tunnel.”
• Type of wax. Different waxes burn differently and may take longer to create a wax pool.
• Size of the candle and number of wicks. The width/diameter of the candle and the number of the wicks will affect how evenly the candle burns.
• The type of wick. The material the wick is made from and how it is made also affect the burn rate of the candle.
• Rate of burn. How quickly a candle burns is determined by all of the above criteria. If a candle burns too quickly, even the first time, you may not get an even wax pool and your candle will tunnel.
Type of Candle
Because pillar candles are free-standing and not within a container, they require a firmer wax that will not lose its shape as the candle burns. Pillar candles are made of paraffin wax or beeswax, which are more rigid than soy wax. Soy wax is soft and more flexible and is used to make votive candles and is the wax in glass or tin jar container candles.
Type of Wax
The type of wax determines the burn time of the candle. Some waxes, such as beeswax, have a higher melting point and, therefore, have a longer burn time (burn slower). Other waxes, such as paraffin, have a lower melting point and burn quickly.
Paraffin has the lowest melting point at 99 degrees Fahrenheit, but there is low melting wax (typically less than 130 degrees Fahrenheit) and high melting point paraffin wax (typically between 130-154 degrees Fahrenheit). Beeswax melts at about 145 degrees Fahrenheit and soy wax is in the middle at about 120 degrees Fahrenheit.
| Type of Wax | Melting Temperature (Fahrenheit) |
| Paraffin | 99 degrees F (low melting wax) 130 degrees F (high melting wax) |
| Soy | 120 degrees F |
| Beeswax | 145 degrees F |
Candle Size
Large diameter candles require more than one wick to create an even wax pool.
The wax pool is the circle of melted, liquified wax on the top surface of the candle.
Generally, if a candle is 4” or wider it should have at least two wicks. Also, the shape of the candle can affect the burn. If a candle is oval or oblong-shaped, it should have at least two wicks to ensure the entire area of the wax will receive the heat required to burn the wax.
The Wick
Another important factor that influences candle wax memory is the wick, which determines the size of the flame and can also affect the rate of burning (along with the type of wax).
Candle Wax + Wick –> Size of Flame + Rate of Burning
Wicks can be made of cotton fibers or wooden sticks. Other materials for wicks include paper, zinc, or tin.
Also, how the wicks are created is important. The best (slowest) burning wicks are braided, plaited or knitted, which allow a slow, consistent burn. The fastest burning wicks are twisted.
Smaller flames may not create an even wax pool. The wax pool should always be even across the surface of the candle. You don’t want to blow out a candle too soon! This is what creates candle tunneling!
Thicker wicks, or a larger flame, creates a higher temperature and larger wax pool, which will cause the candle to burn faster. This can lead to sooting. If the flame starts to smoke, it will create black marks or streaks. So, it is important to find the right balance with having the appropriate size wick or the right size flame for your candle diameter.
Wick + Size of Flame = Rate of Burning
Diameter of Wick + Material of Wick –> Size of Flame –> Wax Pool
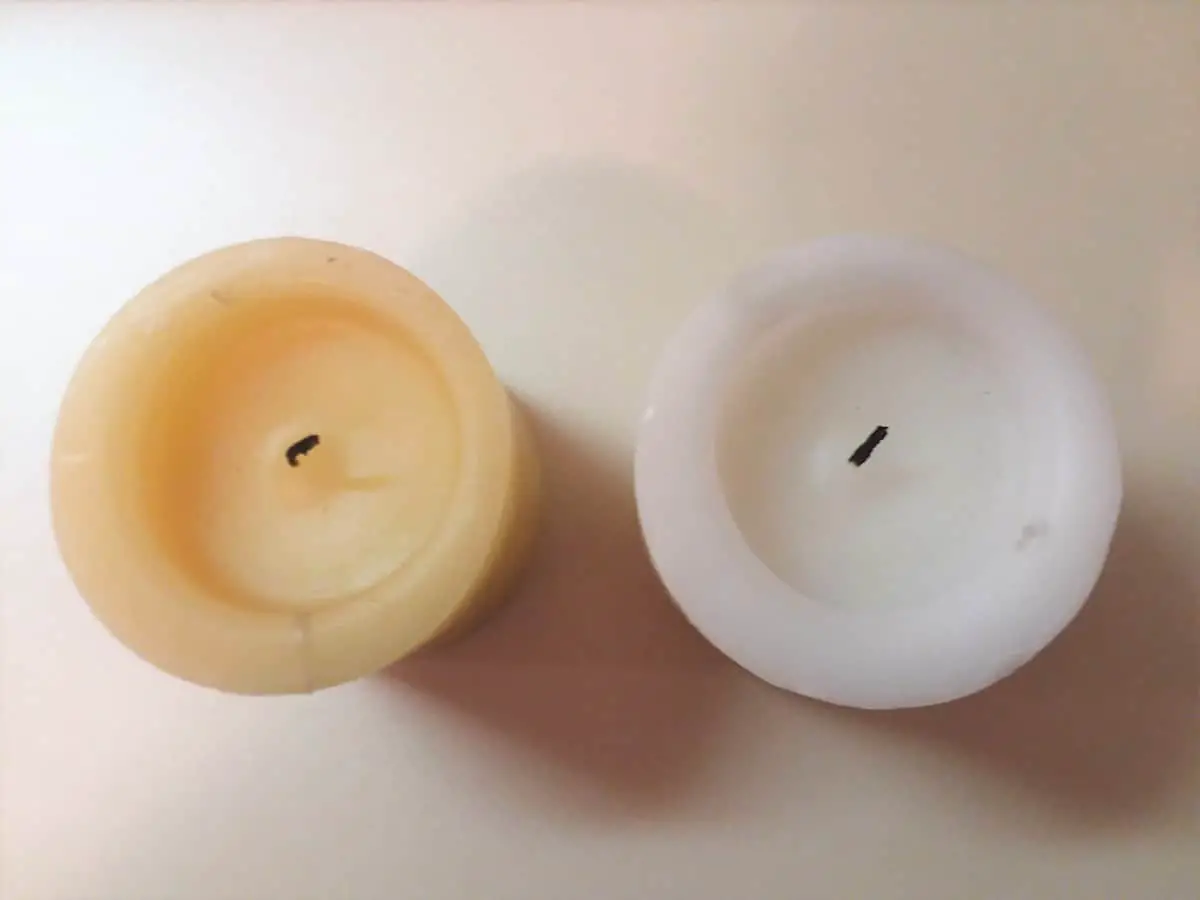
What is Candle Tunneling?
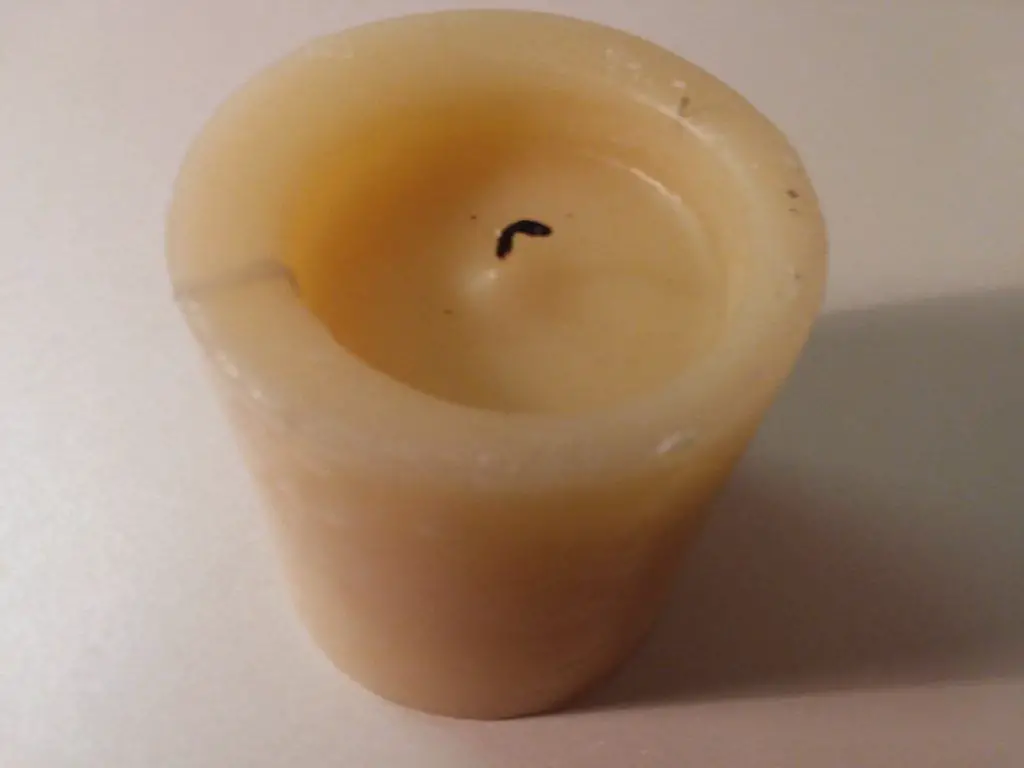
Candle Tunneling is when the center of the candle burns more quickly than the outer rim of the candle. This causes a ring of candle wax to form around the edge of the candle, which makes it harder to light the candle, because you have to reach in to light the wick or dig around to find the wick.
As the wax melts, it may even start to cover the wick and your wick becomes buried and you lose your wick. Candle Tunneling is caused by many factors, including, candle type, wax, wick and size/diameter of the candle.
As mentioned earlier, a candle should burn for a minimum of 2-3 hours the first time you light it, but the exact time depends on the size/diameter of the candle. Burn the candle for about 1 hour for every 1 inch in width.
For example, if you have a 3-inch diameter glass jar candle, burn the candle for at least 3 hours. However, you want to make sure you have a full wax pool before extinguishing the flame. Therefore, this may change. If you have a 3-inch diameter pillar candle and have burned it for 3 hours, but the outer ring of wax has still not melted, you may have to burn the candle for an additional 30-45 minutes to get a full, even wax pool.
How to Fix Candle Tunneling
Of course, the best approach is to prevent candle tunneling from the get-go, but sometimes stuff happens and we may start to get a tunnel before we realize it. The best piece of advice is to try to fix candle tunneling as soon as you notice it. If you have too large of an outer ring (too much wax), you may have to waste or discard some of the wax to dig out your wick. And that is no fun, especially if you paid for the candle. You are essentially throwing money out if you have to discard any wax that you paid for!
Here are a few different techniques or tips to fix candle tunneling.
- Take a sheet of aluminum foil and wrap it around the top of the candle to create a “cave” with an opening on top to allow the heat to escape. Make sure you give the flame enough room and don’t wrap the aluminum foil too tightly! Use only one “layer” of aluminum foil, meaning don’t wrap the foil more than once around the candle.
- Put the candle on a candle warmer. This heats up the entire candle and will melt the wax evenly, creating a smooth wax pool. The bad thing about this, is that you may lose your wick if you have a large wax ring on the outer rim. You may have to just allow the candle warmer to evaporate the wax, until the wick is visible again. However, this could take a long time.
- Scrape out the excess wax using a heating instrument and tool, such as a spoon or butter knife. Melt the wax with a hair dryer or candle warmer and either scrape or pour out the excess wax. If you chose to do this, save your wax to reuse again. Otherwise, you are wasting wax and money!
- Extend the wick. This may be the best way to fix candle tunneling. The idea is to add material to the wick to make it longer, so that when the wax melts into an even pool, even though the original wick may be buried under the wax pool, there is still a wick above the wax pool that will still be burning and melting the wax. The candle will eventually burn down to the original wick.
I have a couple other blog posts that you might find helpful with fixing a tunneled candle.
If you’re trying to extend your wick and you would like some ideas on what you can substitute for a wick, you can read my article “How to Choose a Wick and Make Your Own Wicks.”
If your wick is already buried, my blog post on “How to Fix a Wick Lost in Wax” can help with some ideas on how to get your candle burning again.
How To Prevent Candle Tunneling
To prevent candle tunneling, it is important to burn your candle right the first time!
Tip #1 to prevent candle tunneling: DO NOT extinguish a flame if the wax pool has not yet encompassed the entire diameter of the candle top.
Create the perfect candle wax memory from the beginning. Make sure you are prepared to burn the candle for 2-3 hours the first time you light it!
Wick trimming is also very important. You want to always keep your wick trimmed to 1/4-1/8” at all times, which will help create the right size flame, prevent soot, and create an even wax pool.
Related Questions
How long can you safely burn a candle? What happens if you burn a candle too long?
A candle should never be left attended or remain lit overnight, such as when you are sleeping. Finding the right burn time is a delicate balance. If you burn a candle for too long, soot will start to form. However, as already discussed, if not burned long enough the candle will tunnel. Again, many of the above factors (candle type, wax, wick, etc.) will determine the time frame, but an estimated range could be 4-18 hours.
Sometimes candle tunneling creates soot, or black residue, on the wax. Some people may think this is simply an annoying, unattractive feature. However, it is important to note that an accumulation of soot can affect the candle life.
I’ve followed this advice, but my candle still burns unevenly.
There may be other factors in play that are affecting the flame or burn cycle of the candle. One common factor is air circulation or drafts. If your candle is near an open window or underneath an air vent, the air circulation blowing on the candle will make the flame flicker and affect the burning of the wax and could create soot.
Recent Posts
An In-Depth Beginner Basics Manual on Candle Wicks: Wick Names and Numbers
Wick testing has to be the most frustrating part of candle-making for me. While I’ve been learning about the different types of wicks and which wick goes best with which wax, I noticed that...
A Complete Intro Lesson to Candle Wax Basics: How to Decipher the Code
After finishing my first candle-making kit and watching YouTube videos, I decided I wanted to try making more candles. I needed to order more wax, but quickly realized the options were...
