

I’ve been looking forward to writing this post for a long time. This topic is the reason I got into candle-making: how to decorate candles with tissue paper. First, let me tell you how I got interested in this.
Eleven years ago, my cousin gave me a candle. She had decorated some candles in memory of our grandfather that had just passed away and gave them to us grandkids after the funeral. It was a beautiful sentiment.
I was impressed with the idea and asked her about it. She told me how she made them. She had actually used a different method than the tissue paper project I am talking about today, but nonetheless it is what got me interested in decorating candles.
After doing my own research, watching YouTube videos, and learning about how to decorate candles, I came across this tissue paper method. For some reason, this is something I gravitated towards and have practiced for several years.
As a start to my YouTube channel, I made a video tutorial to complement this blog post. Here it is below if you want to watch it or check out my channel.
I make memorial candles using this tissue paper method. Let me tell you how I do it!
How do you decorate a candle with tissue paper? Design and decorate a sheet of tissue paper that will fit around a pillar candle. Cut out the tissue paper, so that it wraps around the pillar candle. Using a heating tool and wax paper, heat the wax so the tissue paper sticks to the candle.
The thing I like most about this technique is that you can use it for any holiday or occasion: birthdays, Mother’s Day, Valentine’s Day, Christmas, Weddings, Anniversaries, etc.
Also, I like that you can personalize these candles, so you can add a name, special message, or a photo.
They make great gifts!
I decided to kick off a 5-Part DIY Candle Series with this topic today. I will be writing 5 blog post articles, each covering a different DIY candle idea:
- Decorating pillar candles with tissue paper
- Tie-Dye or Marbled Candles
- Water Candles
- Jewelry and Hidden Surprise Candles
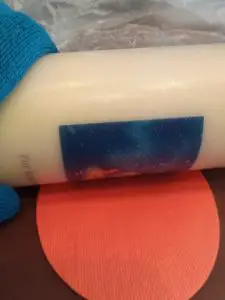
- Galaxy Candles
Let’s start with today’s topic of decorating a candle with tissue paper.
How to Make Tissue Paper Candles
Here is the recipe for making a tissue paper candle:
SUPPLIES:
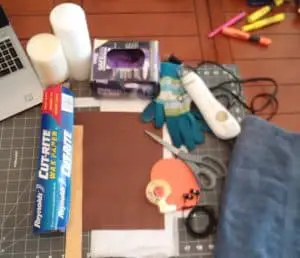
- Plain white or neutral-colored pillar candle, scented or unscented
- Plain white tissue paper
- Ruler or measuring tape
- Scissors
- Cardstock, or regular copy paper (any color)
- Double-Sided Tape or Scotch Tape
- Wax paper
- Heating (or embossing) tool
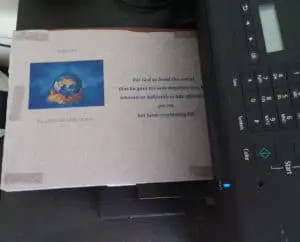
- Some way to design/decorate the tissue paper: markers, ink/stamps, etc. (I prefer to use my computer & printer, by designing something in a Word document)
- Gloves, oven mitt, and/or towel, something to protect your hands and surface you are working on
- Craft Mat (I think these are made of silicone) or an “easy-gripper” style pad (I think these are made of vinyl), to roll out the candle when done
- Optional: Ribbon, flowers, or other embellishments you might want to add to the candle (washi tape would even work), hot glue applicator
- Optional: Earplugs or headphones to block out the sound of the heating tool; it can be loud
NOTE before we start: The tissue paper and wax paper should not be wrinkled. The design does not transfer as well if it is.
So, I would advise against re-using tissue paper from gift bags, unless you have been able to smooth it out enough to where there are no to very small wrinkles. (I don’t know if you can iron tissue paper?)
Also, you might NOT want to re-use the same wax paper, if you are making multiple candles. I have found this does not work for me, because there are imperfections in the candles afterwards.
DIRECTIONS:
1 – Measure and Cut
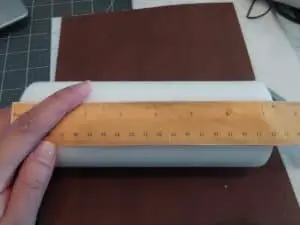
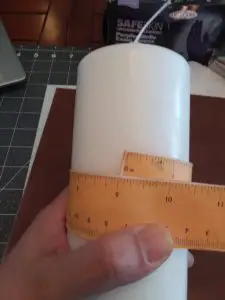
Measure the height and circumference of your candle and cut out a sheet of tissue paper a little larger.
When I’m making batches of candles, I will just cut out sheets of tissue paper the same size as regular copy paper, 8 ½ x 11 inches, because then I tape those directly onto the cardstock for the printer.
Then, after it’s gone through the printer, I carefully pull or cut off the tissue paper and re-use the cardstock for another sheet of tissue paper.
2 – Design Your Candle
Next, think of what you want to put on your candle. You can make it as simple or intricate as you want.
Using Computer/Printer
For example, if you want to put a photo of yourself or a family member onto your candle, you can use your computer and printer to print the photo onto the tissue paper.
Keep in mind the tissue paper is too thin to go through the printer by itself, so you will have to tape it to a thicker piece of paper. I use cardstock (usually the ugliest or least used colors I have, generally browns and greens), but you can use regular white copy paper, as well.
Another reason I prefer taping the tissue paper to cardstock rather than to regular copy paper is that it is easier to remove, which allows me to re-use the cardstock.
You just want something thick enough that the printer will pick it up and push it through, so it will print on your tissue paper.
Draw/Color It Yourself: Markers, Ink/Stamps
If you want to go the simpler route, you can simply color/design the tissue paper yourself using markers or stamps.
Keep in mind the tissue paper is thin and it will bleed through, so you will probably want to put copy paper or cardstock underneath the tissue paper you are decorating.
You could also tape the tissue paper to the cardstock or copy paper or your work surface, so it doesn’t move around when you’re coloring/decorating it.
Allow the ink to dry; this should only take a few minutes.
3 – Cut to Wrap
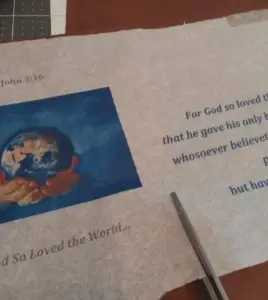
After you’ve either printed, colored, or stamped your design onto the tissue paper, cut it out so that it will wrap around the candle.
Try to cut out as much of the white space as you can, but you don’t have to cut right up to your design. You can leave a little bit of white space.
A ¼-inch border around your design is fine.
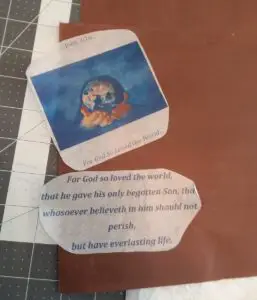
You may find it is easier to cut out your design in pieces, rather than try to wrap it around in one big sheet.
4 – Wax Paper
Tear off a sheet of wax paper that will be large enough to wrap around the candle and a few extra inches for you to hold onto.
Pay attention to which side has the waxier surface, because that is the side that will be pressed against the surface of the candle.
It is usually the top of the wax paper as you are pulling it out of the package. So, you will be wrapping it opposite of how it was wrapped in the package.
5 – Glove and Wrap
You might want to put on gloves during this step, because you will find that you will want to protect your hand when we get to heating the candle.
Now, you will take your tissue paper and wrap it around the candle.
Make sure it is even or laid out exactly how you want it to appear on the candle.
If you cut your design into multiple pieces, just do once piece at a time.
Once you have the tissue paper design positioned how you want it, you will wrap the wax paper on top.
Again, make sure everything is even and the wax paper is smooth.
You should have enough of the wax paper to hold onto.
6 – Heat It Up
You might want to put in earplugs or put on noise-cancelling headphones during this step, because you will find that it gets noisy when we get to heating the candle.
Once you have the tissue paper situated on the candle and the wax paper wrapped snugly in your hand, use your heating tool to heat up the surface of the candle.
THIS IS HOT, WATCH YOUR HAND AND FINGERS! If you don’t have gloves or an oven mitt to protect your hand, you can simply drape a towel over your hand to protect it.
And it can get loud. I usually wear gloves and earbuds when I do this.
You want to start on one edge and work your way around, not moving too quickly, but not staying in one spot too long either. This takes some practice and is a delicate balance.
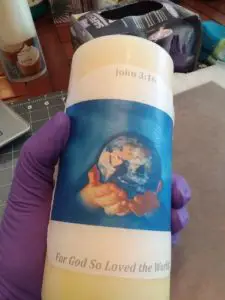
You should notice how the surface starts to get glossy and you will no longer be able to see the boundary of the tissue paper, because it is being absorbed by the wax.
You will notice that as the candle wax melts it absorbs the tissue paper. Therefore, when we are done, the tissue paper (and your design on it) has become part of the candle (embedded or absorbed into the wax).
As you are heating the surface, you want to watch for air bubbles and rub those out.
I wear gloves and earbuds when I do this, because it can get very hot and very loud.
7 – Roll It Out
Roll out the candle on a flat-surfaced craft mat or “easy-gripper” style pad to get rid of any air bubbles and to flatten the surface, so there are no bumps from the melted wax.
You can also rub your fingers across the surface to even out the surface and get rid of air bubbles. This is where the gloves and towel come in handy, because you will find that pieces of wax may flake off as you are doing this.
8 – Unwrap It
Once all of the tissue paper has been absorbed by the candle wax, you can turn off the heating tool and unwrap the wax paper.
You should have a smooth surface on your candle with no air bubbles and the design of your tissue paper is now part of the pillar candle.
Optional: Add any embellishments you may want, such as ribbon or flowers, etc. Washi tape would work, too.
This could work as a kid’s project. They would love to decorate it themselves with markers. And it would make a great gift for grandma! However, it would require an adult to heat the candle.
How to Decorate Battery-Operated Candles
I recently discovered that this technique can be used on battery-operated candles, as well.
I just tried it for the first time and it worked out great!
I think this would be a great candle for display and it would be a better gift than using real pillar candles, because the person you are gifting it to doesn’t have to worry about ruining the design by burning it.
They can turn it on and the image/writing on the candle is illuminated, while the candle and image is not being destroyed by burning the candle.
You pretty much follow the same directions as if you were putting it on a regular pillar candle.
Just to be on the safe side, you might want to remove the batteries first, before you start heating the candle.
The only thing to remember is that the battery-operated candle needs to have a waxy surface for the tissue paper to stick to. I think most do, but just keep that in mind when you are looking for a battery-operated candle for this project. Make sure it has an outer waxy surface for this.
Other DIY Tissue Paper Candle Decorating Ideas
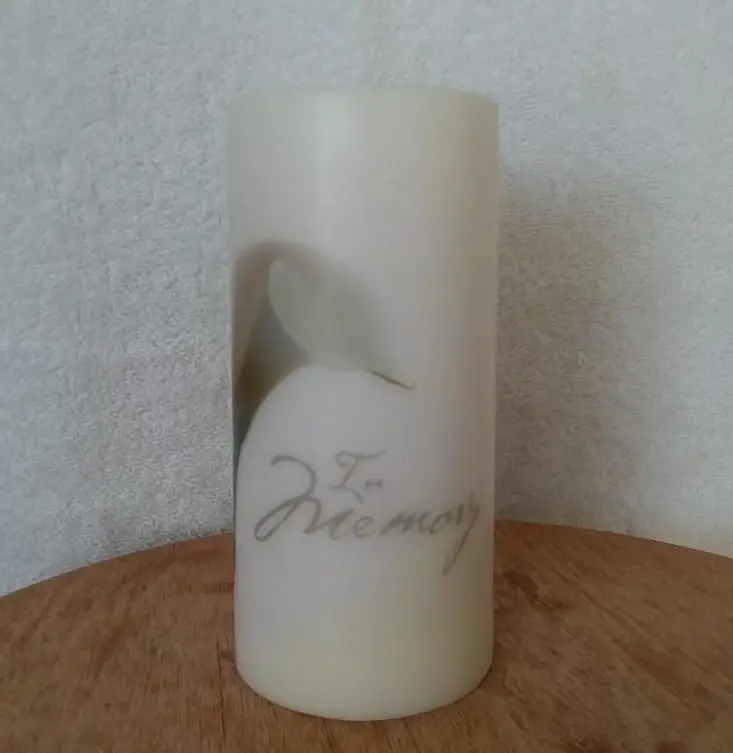
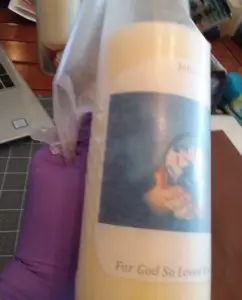
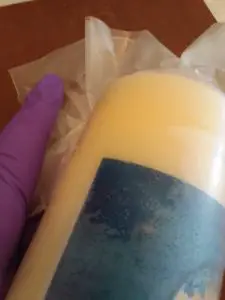
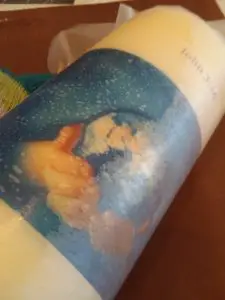
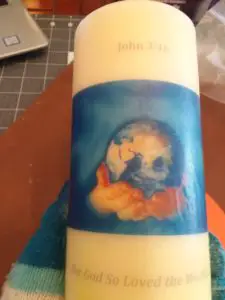
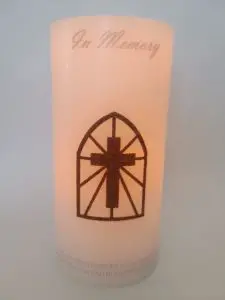
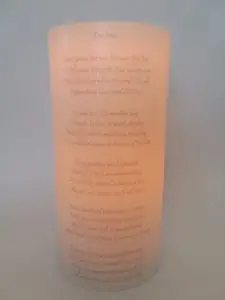
Memorial Candles. As I mentioned earlier, I got into this by making memorial candles for loved ones that had passed away. This makes a beautiful sentiment to put a picture of your loved one with their favorite quote or a poem.
I have personalized memorial candles for sale in my Etsy shop, if you want to take a look. They can be customized with a picture, name, and text.
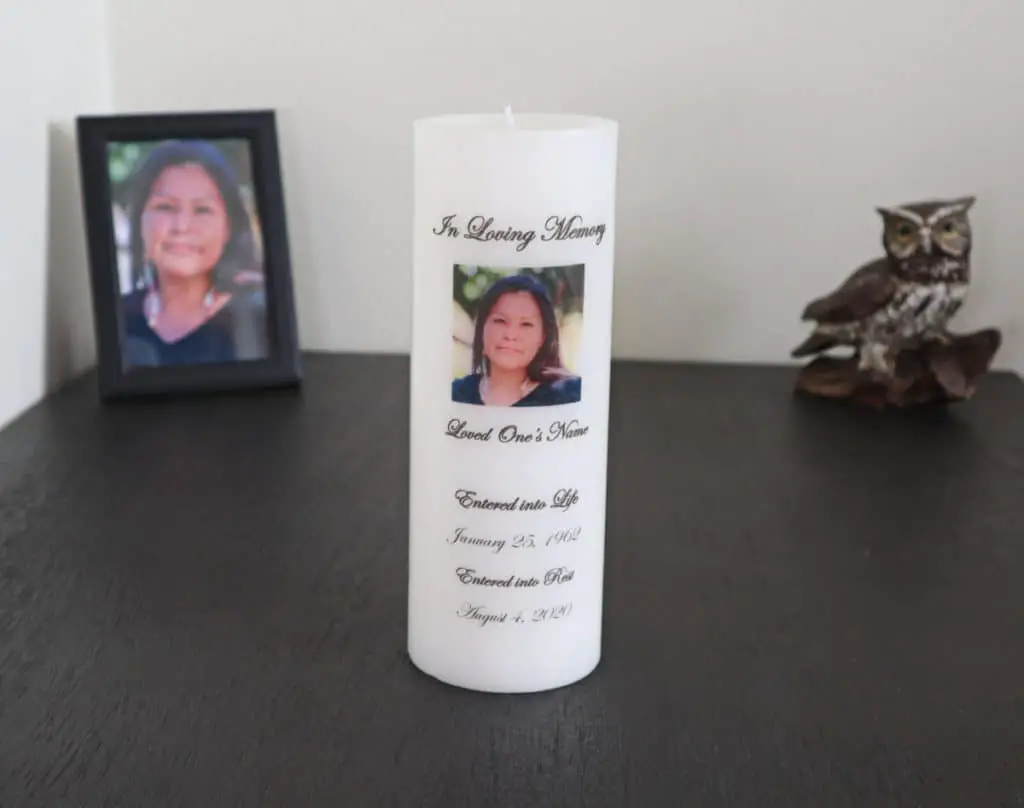
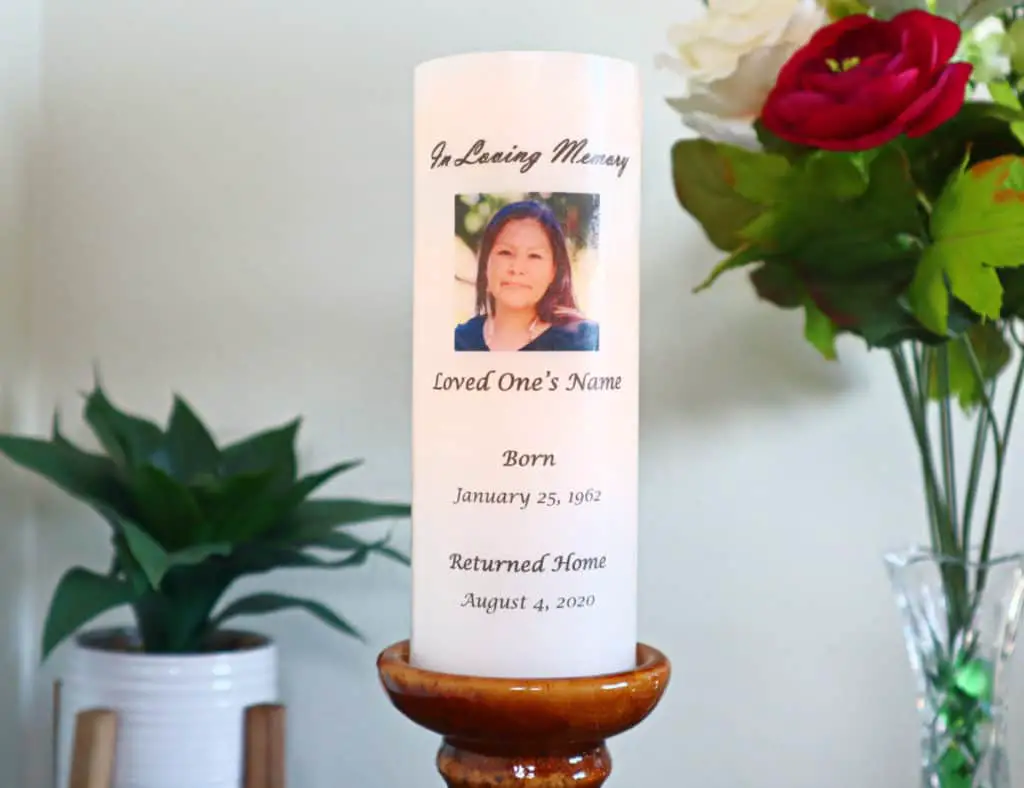
I offer them as a real wax candle or an LED flameless option.
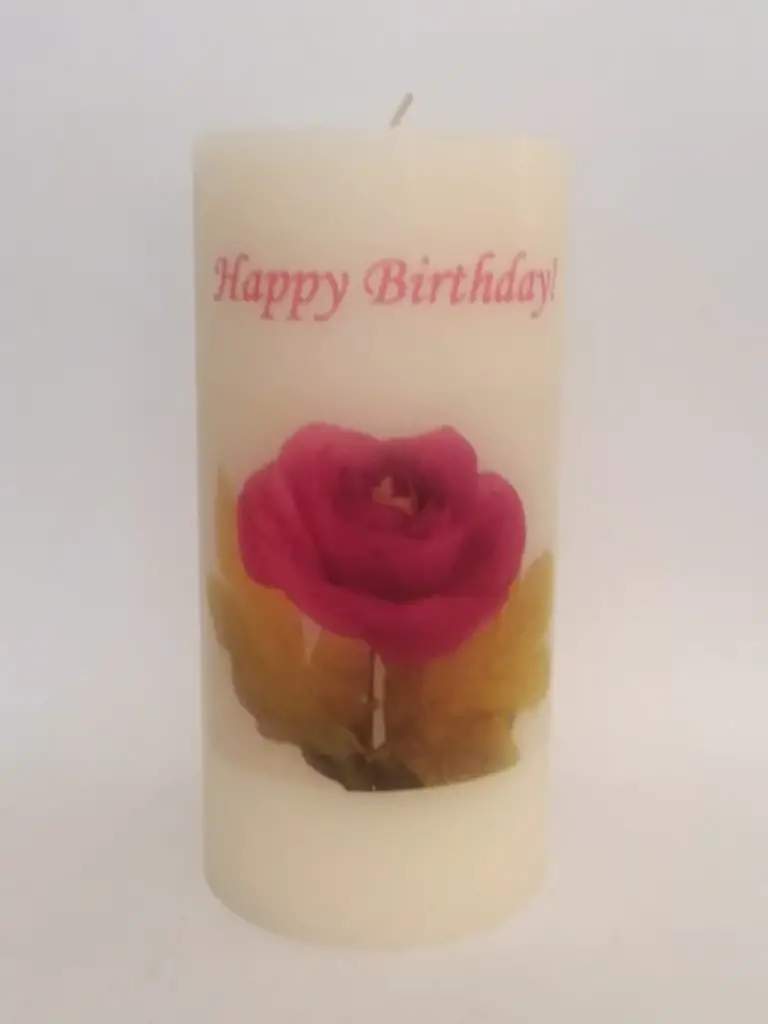
Birthdays. This makes a great personalized birthday gift. You can add a picture or simply embellish it with their favorite colors or flowers.
Mother’s Day. Mom will love getting a personalized Mother’s Day candle from you, especially if you add a picture, funny quote, or other saying to make her day!
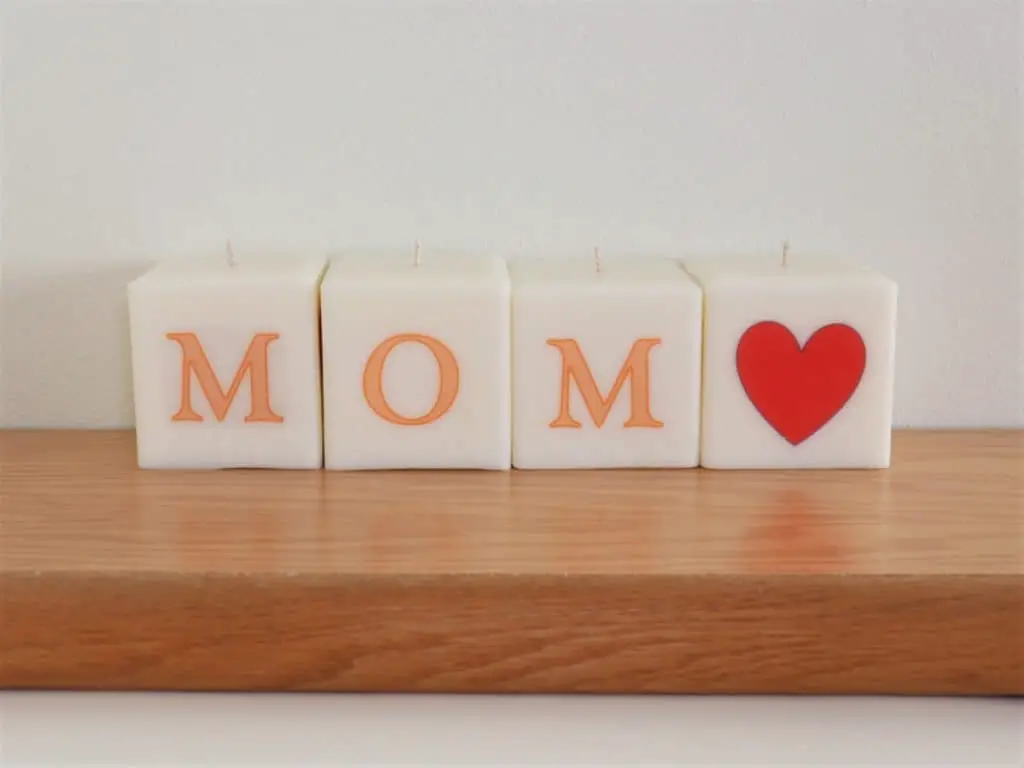
And, of course, I have these for sale in my Etsy shop, as well.
Valentine’s Day. You could stamp the word LOVE with a heart on the candle and add other embellishments to it.
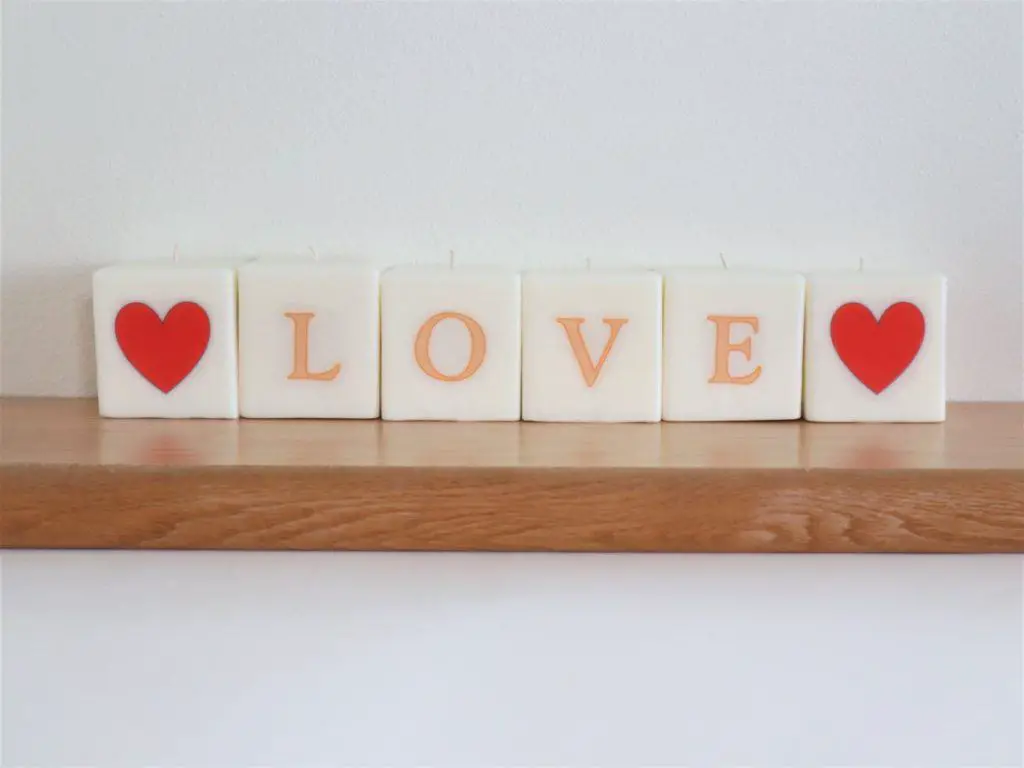
This is what I currently have in stock and these candles are on sale for 10% off.
My Recommended Supplies
Pillar Candles
When I first started making these candles, I would buy one candle at a time from Wal-Mart for these projects. They cost a little over $5, about $5.25.
However, when I started making more in batches, I found a pack of 12 pillar candles on Amazon for $62.92, which averages out to $5.24 per candle. This is about the same price or a little cheaper than Wal-Mart.
Here is a link to the pillar candles I buy from Amazon.
The LED battery-operated candle I bought at Wal-Mart is actually cheaper than the real pillar candles I had been using. This one I used for this project cost me $4.22.
Tissue Paper
Tissue paper is cheap. You can buy a pack at Wal-Mart or a dollar store for a buck.
And you will get several uses out of it.
I have found that from a 50 cm (about 20-inch) square sheet of tissue paper I can cut 4 sheets for 4 tall pillar candles. The pillar candles I use are 3-inches wide by about 8-inches tall.
And you are getting multiple sheets in the tissue paper package you are buying. So, you just need to get at least 3 sheets for $1 to be able to make your 12 candles.
Double-Sided Tape
As I mentioned earlier, I prefer to use double-sided tape. However, scotch tape would work just as well.
I would avoid using any type of thicker or stronger tape, such as duct or packaging tape. It is not necessary.
I like that I can remove the tissue paper and re-use the cardstock by using double-sided tape. It seems to come off easier than scotch tape.
Heating Tool
You can buy this at Michael’s, Jo-Ann’s, Hobby Lobby, or another craft store. The average price for this is about $25, but with their coupons, you can probably get it for $15-20.
Here is a link to the one I have. It is a Heidi Swapp heating tool.
They are also called embossing tools.
Additional (Related) Questions
Here are some common questions people usually ask with this technique:
Can I Use a Hair Dryer for a Tissue Paper Candle?
Yes, you could, but it is not as precise.
The mouth of a hair dryer is wider, so you will not be able to direct the heat as precisely and a hair dryer does not get as hot as a heating tool, so it will probably take longer.
However, I started with a hair dryer before I bought my Heidi Swapp heating tool. It allowed me to practice the technique and find what did and what didn’t work for me.
Can I Burn a Tissue Paper Candle?
If the candle has been made properly and the tissue paper has been completely absorbed by the wax, it should be okay to burn.
However, use caution! Follow the regular safety rules of burning any candle: keep away from flammable objects, do not burn unsupervised, and keep the wick trimmed.
Also, if you do add any embellishments, such as washi tape, ribbon, or flowers, those will have to be removed prior to burning.
Don’t forget to remove any flammable embellishment objects from the candle, such as ribbon, flowers, etc.
Can I Re-Use Tissue Paper or Wax Paper?
No, I would advise against this.
The tissue paper and wax paper should not be wrinkled. Your design will not transfer as well if it is.
Therefore, when you are making multiple candles, you might NOT want to re-use the same wax paper.
And don’t re-use tissue paper from gift bags that is wrinkled. I have found this does not work for me, because there are imperfections in the candles afterwards.
How Much Does It Cost to Make a Tissue Paper Candle?
How much does this project cost? If you buy all of the required supplies I am suggesting to make multiple projects, the total cost is $102.74. If we average that out for the amount per candle to make 12 candles would cost $8.56 per candle.
Add a cute card and this would be a $10 gift for someone!
Here is a break-down of the pricing:
- Pillar Candle: $5.25 for one, $62.92 for a package of 12
- *White tissue paper: $1.00
- *Scissors: $1.73
- *Cardstock or copy paper: $4.22
- *Tape: $2.98
- *Wax paper: $1.62
- *Heating tool: $24.99
- *Markers: $3.28
*Can be used for multiple projects.
I indicated the supplies that could be used for multiple projects with an asterisk.
I added up the cost of all the required supplies, but did not account for the optional supplies, such as the embellishments, headphones, gloves, towel, or silicone mat.
For some supplies, if there are different options available, I simply went with an average cost.
However, keep in mind that most of the supplies you will buy will allow you to make multiple candles. For example, I reuse the cardstock.
Therefore, if you are looking to sell these candles, as I am, a general rule of thumb for pricing your candles is to quadruple the cost of your supplies.
When figuring out pricing for your candle products you are selling, you double the cost of what it took to make your candle to get whole-sale pricing, then you double that price to get the price you should sell it for.
So, if I were to sell these candles, my wholesale price would be $17.12 ($8.56 x 2) and I should sell these candles at $34.24 ($17.12 x 2).
However, I should note that the LED battery-operated candle was actually cheaper than the real pillar candles. They are $4.22 each, which saves you a little over a buck for each candle.
If we take that pricing difference into consideration, the new wholesale price for the LED candles would be $15.06 and you can sell these candles at $30.12.
Other DIY Candle Ideas in this Series
Thank you for reading to the end! This was Part 1 of a 5-Part DIY Candle Ideas Series. I will be discussing different ideas for how to decorate your own candles and make different styles/types of candles in this DIY series.
Here are links to the other 4 articles in this series:
Sign up for Notifications
Want to know when I post my next article? Sign up for my blog post notifications and I will email you when the next one goes live!
