

I was amazed when I first saw these types of candles. I didn’t know it was possible! It is a unique idea and would make a great gift.
How do you make jewelry candles or candles with hidden gifts or messages? Wrap a small piece of jewelry, such as a ring or necklace, in a piece of aluminum foil. Put the foil package against the edge or side of the container, as you are making your candle. You can also write a special sentiment on a paper circle to put on the bottom of a tealight candle.
This is Part 4 of a 5-Part DIY Candle Series. I have written 5 blog post articles, each covering a different DIY candle idea. If you enjoyed these candle ideas, please check out these other DIY candle ideas:
- Decorating pillar candles with tissue paper
- Tie-Dye or Marbled Candles
- Water Candles
- Jewelry and “Surprise Messages” Candles
- Galaxy Candles
How to Make Jewelry Candles
While researching this post, I came across a YouTube video by Timber Ridge Gifts. If you are not familiar with his channel, I would recommend that you check it out.
You can view his Jewelry Candle video here.
What’s the best type of wax to use for jewelry candles? A plant or vegetable-based wax, such as pure soy or coconut, is best for jewelry candles. They have lower melting temperatures and are easier to clean from jewelry. You DON’T want to use paraffin or a paraffin-soy blend wax, because if it does happen to get on the jewelry, it will be much more difficult to clean from the jewelry.
Vegetable-based waxes will wash off with soap and water, but paraffin waxes will stick much more to the jewelry, which will make them harder to clean.
Also, soy and coconut wax have the lowest melting temperatures. Soy wax has a melting point of 120 °F and coconut wax has a very low melting temperature of 86 – 103 °F, which make it the best option.
Okay, let’s get started with making our jewelry or “hidden treasure” candles.
Here are the supplies and equipment you are going to need.
SUPPLIES:
- Usual candle making supplies: candle wax, pouring pitcher, double boiler or Presto pot, scale, stirrer, thermometer, wick holder, etc.
- Container for the candle (glass or tin)
- Wick
- Hot glue or wick sticker
- Dye
- Fragrance
- Aluminum foil
- Small piece of jewelry, such as a ring, earrings, or a necklace, or other small gift, such as a gem
DIRECTIONS:
Make Your Candle: Melt wax, add dye and fragrance
Start by making your candle as usual, melting your wax, and adding the dye and fragrance at the appropriate temperatures. If you’ve never made a candle before, I will discuss the process here. If you already know how to make a candle, you can skip on to Step 2 of preparing the jewelry.
1 – Set up a double boiler
For beginners, I would recommend using the double boiler method. You take a pot with just a couple inches of water and heat it to boiling on a stove or hot plate.
2 – Weigh out your wax
Then, weigh out your wax in either a separate container or directly in the pouring pitcher. You are going to use about a half-pound of wax for a 12-16 oz. jar. Don’t forget to “zero out” the scale after you put the container or pouring pitcher on the scale, but before you add the wax.
3 – Put pouring pitcher with wax into double boiler
Once the water is boiling, you will put the pouring pitcher in the water and melt down the wax. Keep a thermometer in the wax to watch the temperature. Stir the wax to help it melt down. Once the wax has all melted or reaches approximately 185 °F, turn off the heat. Continue stirring. Allow the wax to cool.
4 – Add dye and fragrance
You will add dye and fragrance at different temperatures, which will vary depending on the type of dye/fragrance and the brand.
Read the label, which should tell you at what temperatures to add, but generally you add the dye at about 175 °F and fragrance at 140 °F or less, but it depends on the flash point of the fragrance.
So, like I said, check the label and follow the manufacturer’s recommendations.
You add the fragrance at a lower temperature, so that it does not burn off from the heat.
The general rule of thumb is one oz. of fragrance for one pound of wax.
If you are just making one candle, I would use just ½ pound of wax and ½ oz. of fragrance.
5 – Prepare the container: Glue wick to bottom of jar
Get your container ready by gluing the wick to the bottom of the jar using either hot glue or a wick sticker. Make sure the wick is centered.
6 – Pour the candle: Add the melted wax to the jar
Then, you pour the candle at less than 120 °F. However, you don’t want to fill the jar. We are going to place the jewelry on top of the candle and pour more wax on top of it. So, I would fill the candle about ¾ full for your first pour.
Start by filling the candle to the point where you want to hide the gift. Place the wick holder on to keep the wick centered. Let the candle harden or solidify a little, so that the wrapped jewelry can sit on the wax and will not sink. While the candle is setting you can prepare the jewelry.
Prepare the Jewelry
Prepare your jewelry by wrapping it in a piece of aluminum foil. You could also use a gemstone or something similar to give as a gift. Make sure you wrap it snugly.
Decide Where to Hide the Gift
Decide if you want to hide the gift closer to the top or more toward the middle of the candle. You probably don’t want to hide it on the very bottom, because if you have a larger candle, it could take weeks for the person to burn the candle enough to be able to retrieve the jewelry. Just keep in mind who you are giving it to and their patience tolerance. 😊
Add Gift After Wax Has Cooled
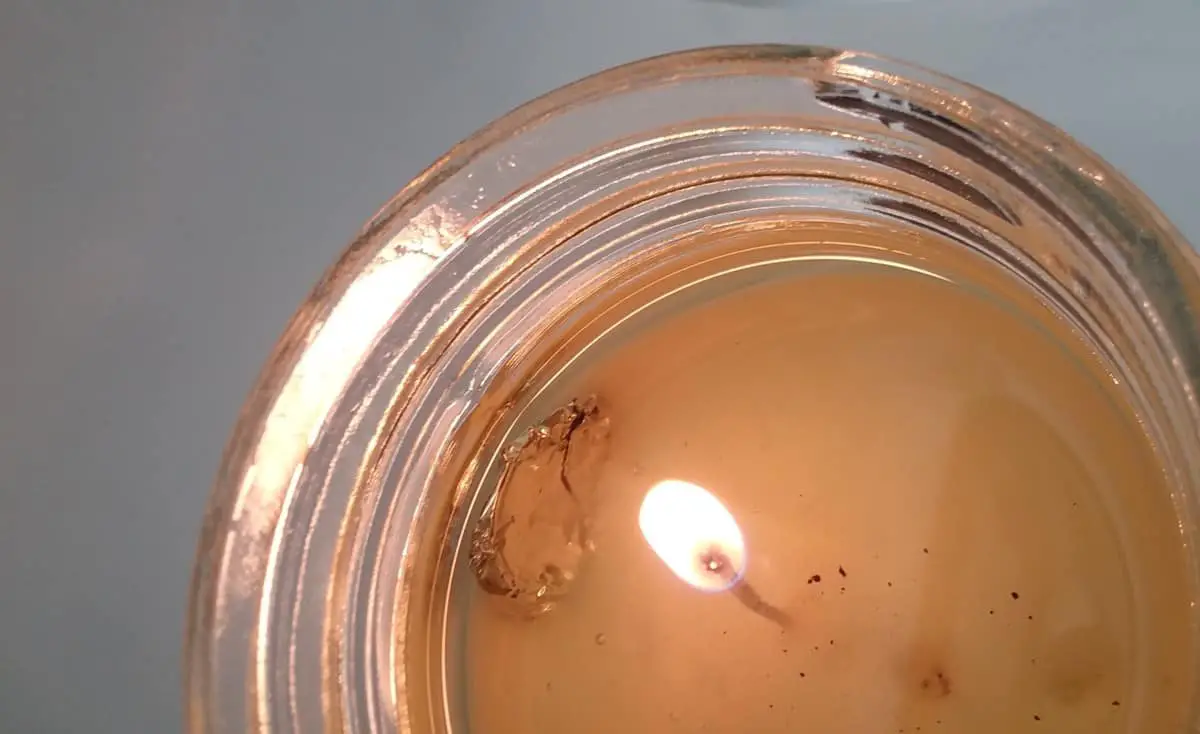
Then, add your wrapped gift after the wax had hardened. Make sure to put the wrapped jewelry against the wall/edge of the glass/tin container of your candle, as far away from the flame as possible. You don’t want it to be close to the flame!
Fill Jar with Rest of Wax
Then, top off your candle by adding more wax. You will have to re-heat the wax from the previous pour.
You might even be able to try to hide other small gifts and prizes to give, such as dollar coins or gems.
You want to let your candle set for a day or so before you give it as a gift or light it yourself. Candles are best enjoyed after the wax has been allowed to “cure” or set for at least a day, but up to a week is preferable.
Light it up and enjoy the fragrance and ambiance while you wait for your gift to appear in the melting wax!
Special Message in a Candle

I found this YouTube video from Natalia’s Toolbox, which was a great tutorial for this project.
You can check out her video here.
What’s great about this project is that you can personalize the message and they are great for any holiday or occasion: birthdays, Valentine’s Day, Mother’s Day. This makes a great proposal idea.
How do you make candles with messages in them? Using tealight containers, create messages on circles of paper and add them to the bottom of the tealight containers, on top of the metal-bottomed wick. Then, add your wax or pre-made tealight candle back into the container to enjoy!
SUPPLIES:
- With this project, you can use either pre-made tealights or make your own
- With pre-made tealights, you can get a big bunch of these from Wal-Mart for cheap.
- If you decide to make your own tealights, you will need all the candle-making equipment for them: tin cups/tealight containers, tealight wicks with the metal bottom, wax, pouring pitcher, double boiler or Presto pot, stirrer, thermometer, dye, fragrance, etc.
- Paper, cardstock
- Computer/printer, ink/stamps, markers, or other way to design/decorate the paper (I’m not that creative to be able to draw free-hand, so I just design things on my computer and print them out)
- Awl, skewer, needle or other device to poke a hole through the paper
- Scissors or a large circle puncher (same size as your candle)
- Optional: Ruler, compass, knife
DIRECTIONS:
Remove Wax and Wick from Pre-Made Tealights
If you have the pre-made tealights, remove the wax from the container by pulling on the wick so the entire candle comes out. You might have to loosen it from the sides of the container by taking a knife and cutting around the walls of the container.
Once you got the candle out, pull out the wick. It should have a metal bottom.
Start Melting Wax if you are making your own candles
If you are making your own candles, it might be easier to start with the next step of designing your paper message first before you make your candles, because we want to add the paper messages to the bottom of the candles, but do whatever works for you.
When you are ready, whether it’s before or after this next step, start heating the wax and adding the dye and fragrance at the appropriate temperatures. If you are a first-time candle-maker, please see the previous section for the exact steps of how to melt your wax and get your candle container ready.
Create Your Paper Message
You are going to design paper circles with messages on them which will appear on the bottom of the candle.
Make these the same size as the candle.
You can either cut out the circles first and then draw on them, or draw the circles on the sheet of paper and then draw/stamp the paper, keeping your design/message within the circle you have drawn.
A compass might be helpful here or you can just use the tealight container or candle to draw your circles.
Since I am not artistic at all, I like to design things on my computer and then print them off. So, I usually go into a Word document and create rows of circles. You do this under “Insert a Shape” and click on the circle/oval. You can change the size of your circle. Make sure it is the same size as your candle, so measure the width of your tealight containers or candle. It will probably be about 1 ½ inch. Then I add a text box with my message using whatever font/color I want.
You could also draw the circles on paper and use ink/stamps to make messages or draw on the paper using markers. Get creative!
Cut Out Your Message
Next, once you have designed and made your circle messages, cut them out, so you have these circles of paper with your message on them. If you have a 1 ½ inch circle puncher (or whatever size is appropriate) in your craft supply set, that would be awesome or you can just cut out your message with scissors.
Make a Wick Hole
You are going to poke a hole in the center of your paper message circle for the wick to go through.
If you have the pre-made tealights, you can just position the paper circle on the bottom of the candle and take an awl, skewer stick, needle, or some other pointed object to poke through the hole that was left behind when you took out the wick.
If you are making your own candles, you will have to measure the center of your paper circles and poke a hole using an awl.
Assemble the Candle
Now we are going to assemble our candles.
Pre-Made Tealights
If you have the pre-made tealights, just reassemble the candle by putting the paper circle on the bottom of the tealight with your message against the bottom of the candle, so that when it is burned your message will be seen though the wax on the bottom.
Put the wick back through the center of the candle and put back into the container.
Making Your Own
If you are making your own candles, place the circle paper on top of the wick, so that the paper is showing your message face-up.
Glue the wick to the bottom of the container.
Add your wax and let them set.
This can tend to be a messy project, because some wax will flake off and the tin cups will become deformed as you are trying to pry the candle out, if you are using a pre-made tealight.
I also had a couple candles that completely fell apart as I was trying to get it out of the tin container. They did not stay together very well, so I did not bother with those.
But I probably could have put the candle pieces back together in the tin container and melted it with a heating tool to get the candle back together, because once it solidified again, it would essentially be one candle again.
Another lesson learned is to be careful of the knife you are using to get the wax out of the tin cup. I used an X-Acto knife to cut out the wax and it cut a few holes in the bottom of the tin container. So, be careful of this, because when you light the candle, the wax will melt out the bottom! Make sure you place the candle on a candle-safe surface.
For this project, it might be best to pour your own tealight candles, that way you don’t have to mess with the mess!
The pre-made candles I used were from Wal-Mart. They are super cheap! I got a package of 50 for $2.33.
I hope you enjoyed this DIY!
This is Part 4 of a 5-Part DIY Candle Series. I have written 5 blog post articles, each covering a different DIY candle idea. If you enjoyed these candle ideas, please check out these other DIY candle ideas:
- Decorating pillar candles with tissue paper
- Tie-Dye or Marbled Candles
- Water Candles
- Jewelry or “Hidden Gift” Candles
- Galaxy Candles
Recent Posts
An In-Depth Beginner Basics Manual on Candle Wicks: Wick Names and Numbers
Wick testing has to be the most frustrating part of candle-making for me. While I’ve been learning about the different types of wicks and which wick goes best with which wax, I noticed that...
A Complete Intro Lesson to Candle Wax Basics: How to Decipher the Code
After finishing my first candle-making kit and watching YouTube videos, I decided I wanted to try making more candles. I needed to order more wax, but quickly realized the options were...
